Shopware can serve media through Bunny CDN using a community-built adapter that uploads your content to a Bunny Storage zone and delivers it through a connected Pull Zone.
The Shopware adapter is built and maintained by the community, not by bunny.net.
1

Create a Storage Zone and Pull Zone

The adapter uploads your media to a Bunny Storage Zone, which is then delivered through a Pull Zone that uses the Storage Zone as its origin. Set up both before configuring Shopware. For details, see How to create your first Pull Zone.
2

Install the Shopware adapter

Download the latest 
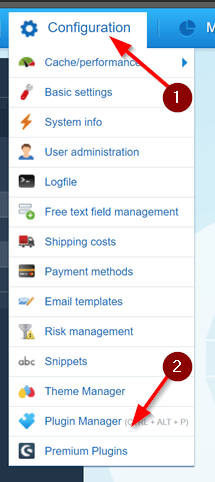
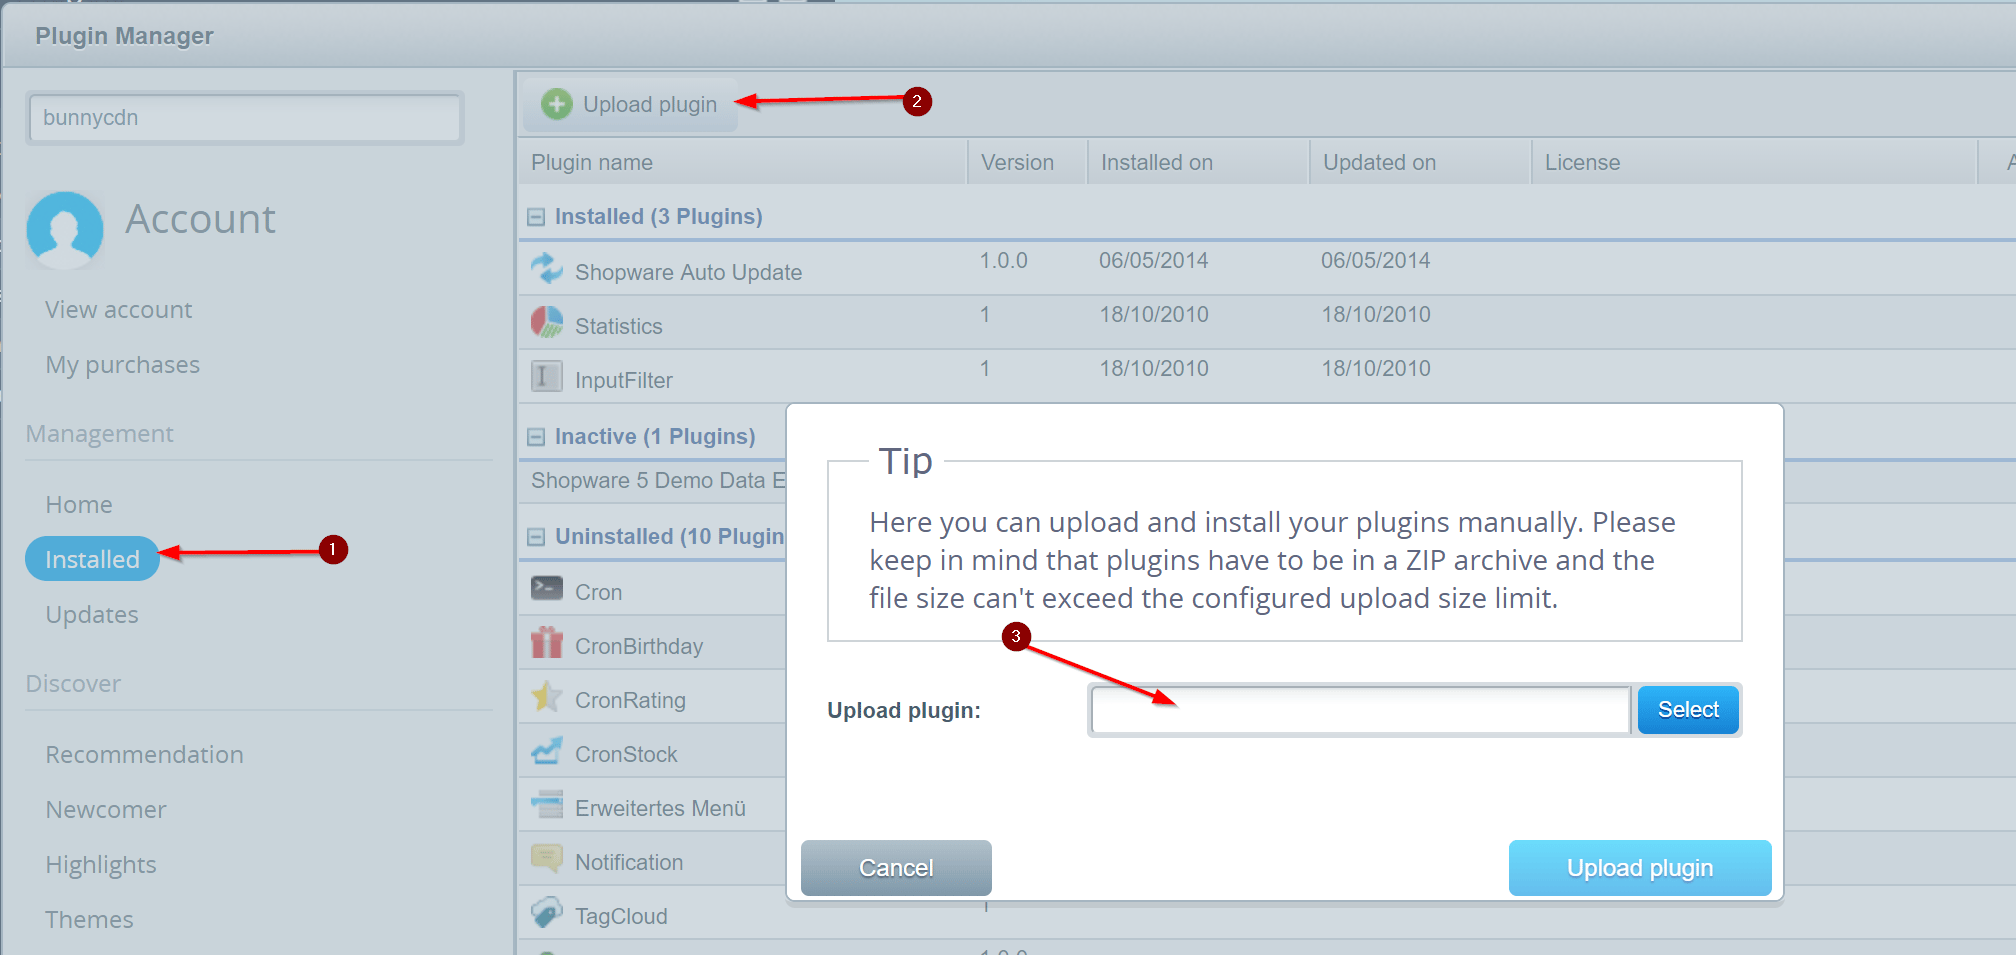
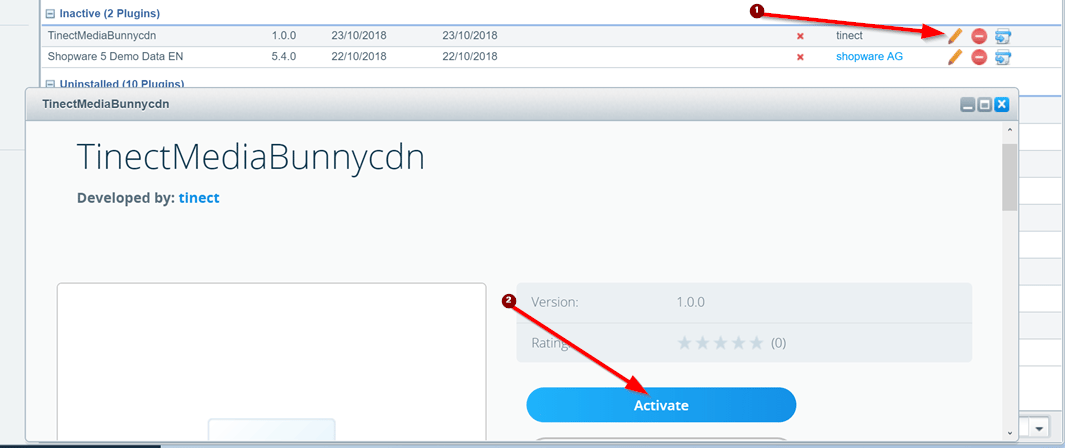
TinectMediaBunnycdn.zip from the adapter’s GitHub releases page.In Shopware, open Configuration → Plugin Manager.
Opening the Shopware Plugin Manager
Go to Installed, click Upload Plugin, and select the ZIP file you downloaded.
Uploading the plugin ZIP file
The plugin appears under Uninstalled. Click the green + to install it.
Installing the uploaded plugin
Once installed, the plugin is Inactive. Click the pencil icon next to its name, then click Activate. If prompted to clear caches, confirm.
Activating the plugin
3

Configure Shopware to use Bunny CDN

You’ll need SSH or FTP access to edit a PHP file. In your Shopware install directory, open config.php and append the following to the configuration array:
'cdn' => [
    'backend' => 'bunnycdn',
    'adapters' => [
        'bunnycdn' => [
            'type' => 'bunnycdn',
            'mediaUrl' => 'https://PULLZONE.b-cdn.net/',
            'apiUrl' => 'https://storage.bunnycdn.com/STORAGEZONENAME/',
            'apiKey' => 'secret-api-key',
        ],
    ],
],
Replace PULLZONE with your Pull Zone hostname, STORAGEZONENAME with your Storage Zone name, and apiKey with the password from your Storage Zone’s FTP & API Access page.Finally, upload your existing local media to the Storage Zone:
bin/console sw:media:migrate --from=local --to=bunnycdn
Your Shopware store now serves media through Bunny CDN.
Last modified on June 23, 2026