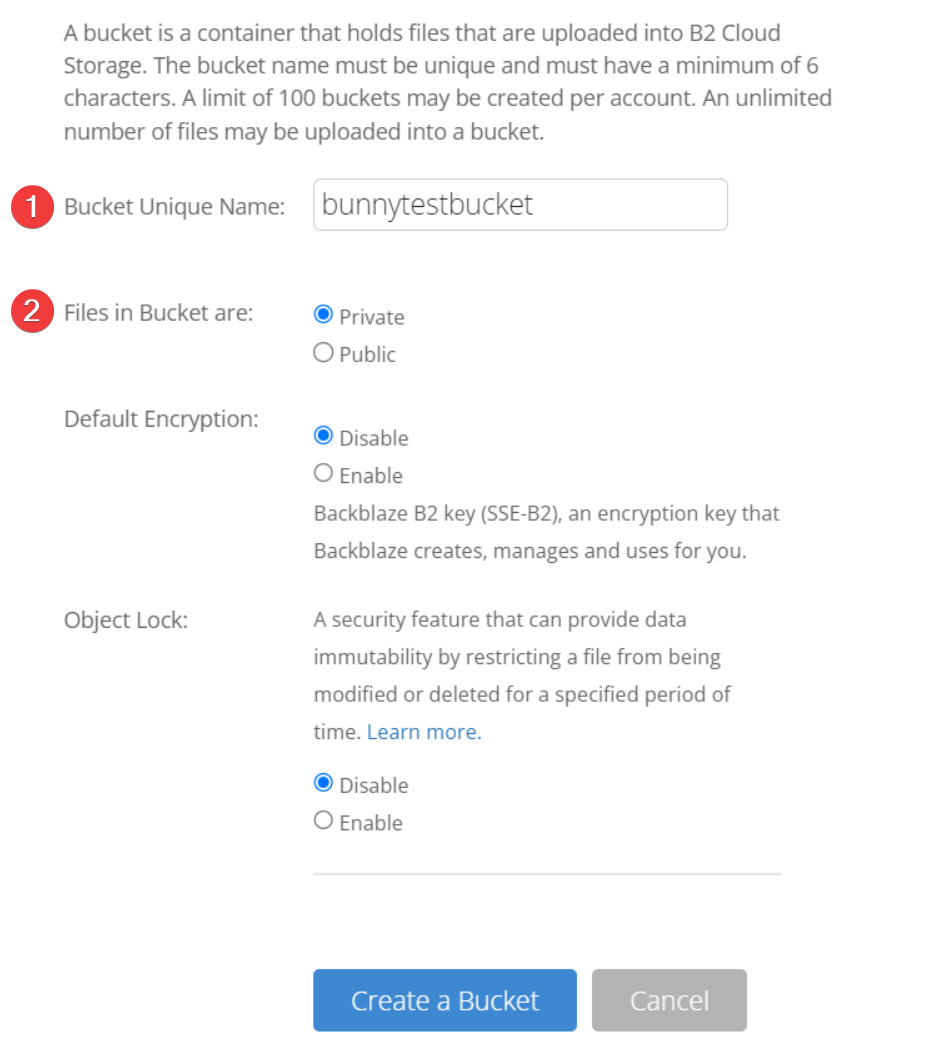
Create a private B2 bucket
Log in to Backblaze and click Create a Bucket. Set the bucket to Private mode to keep your content secure while it’s served to users. Encryption and Object Lock can be left at their defaults.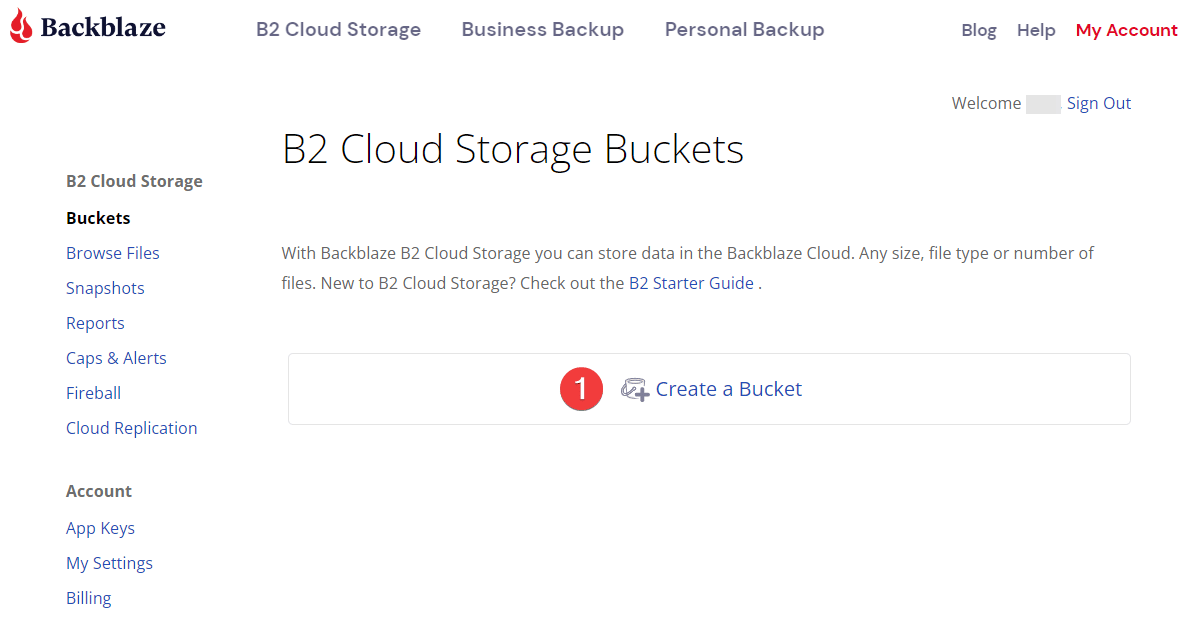
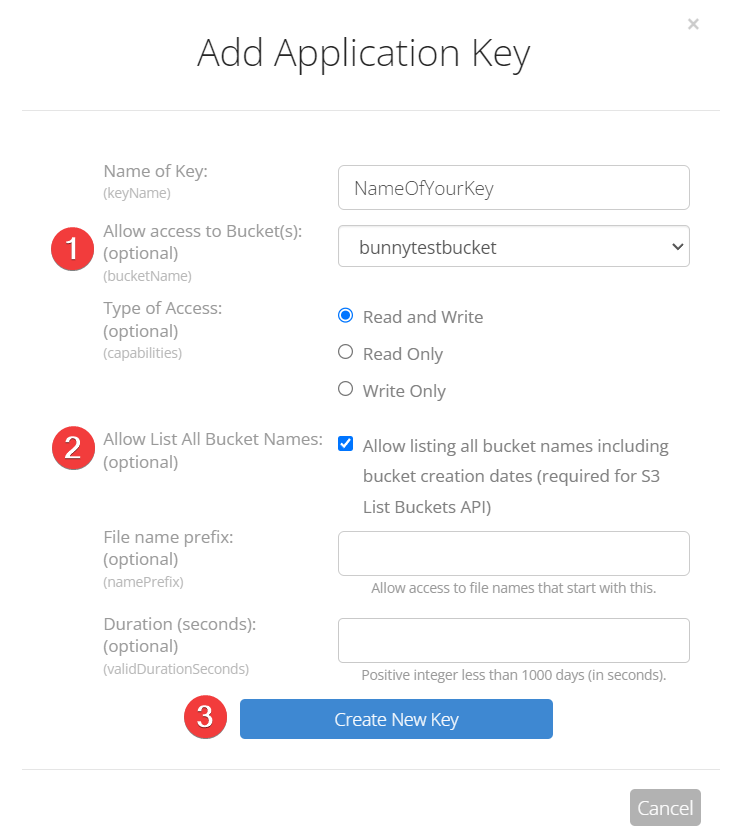
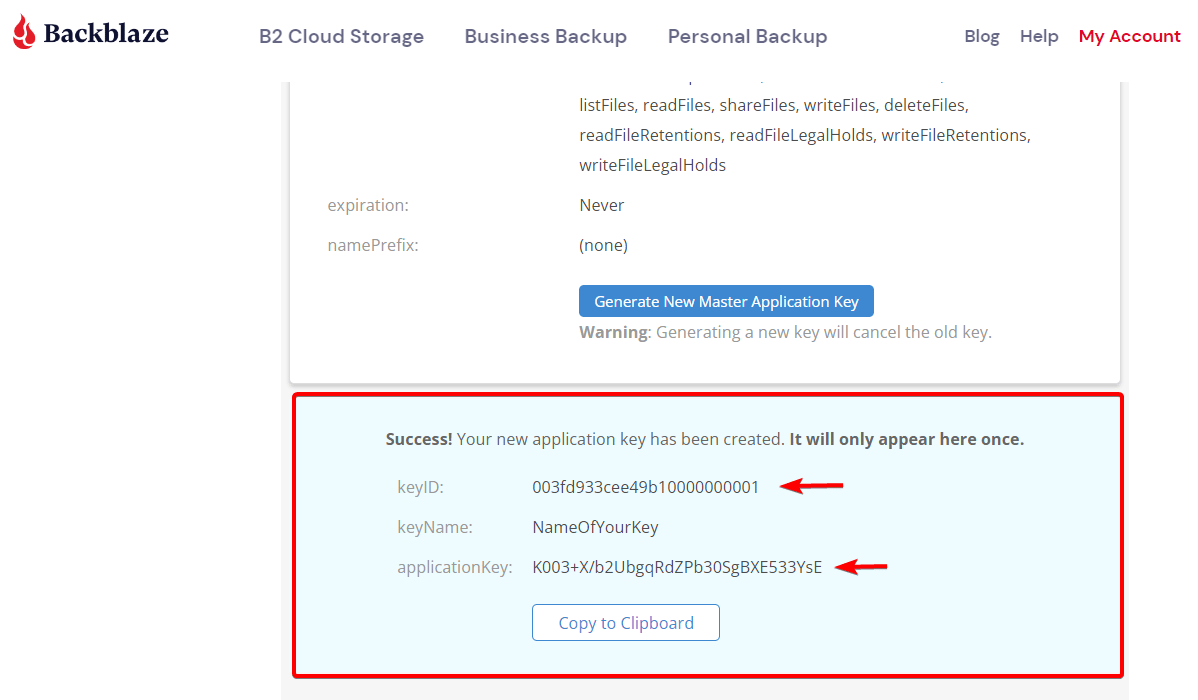
Create an S3 application key
To authenticate securely, Bunny CDN connects to your bucket using S3 authentication. Select App Keys in the Backblaze dashboard.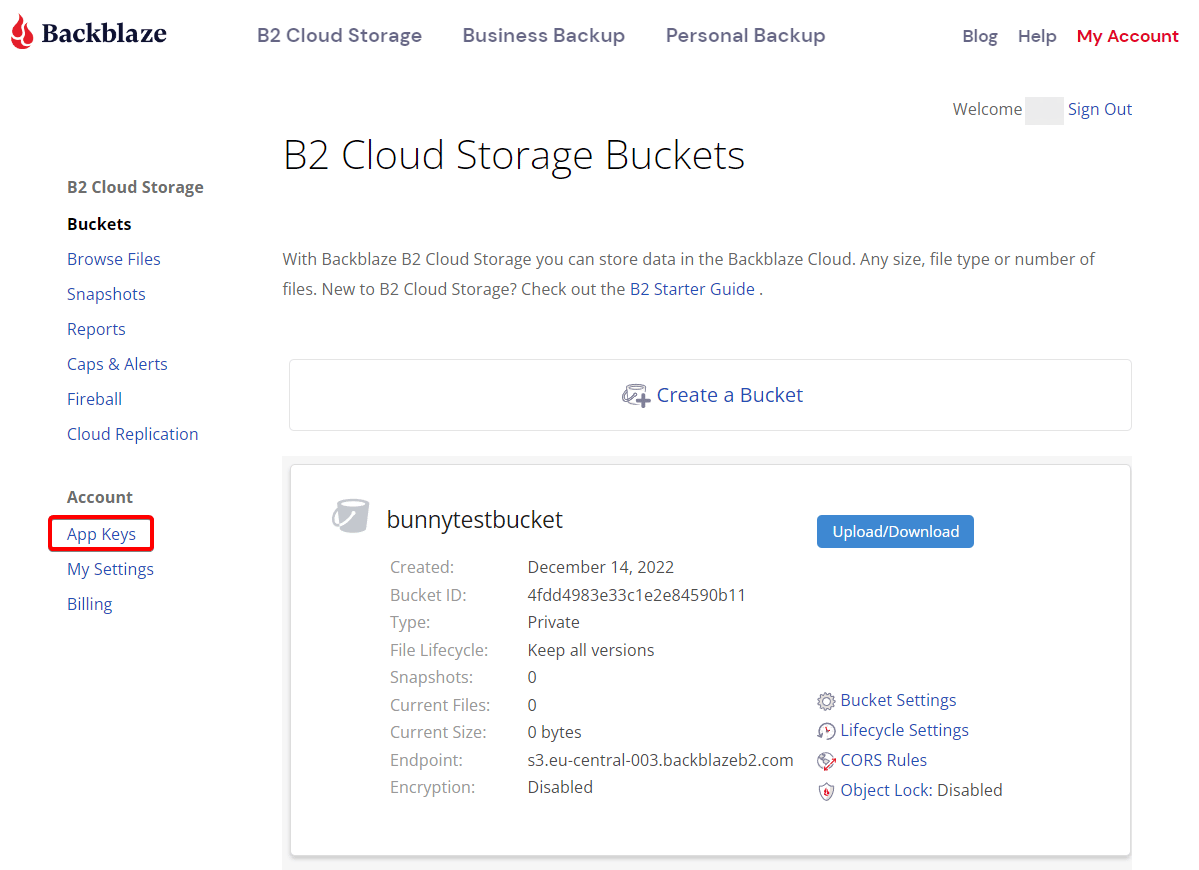

Find your S3 bucket URL
Click Browse Files and upload a test file if you don’t have one. Click the (i) info tooltip next to the file.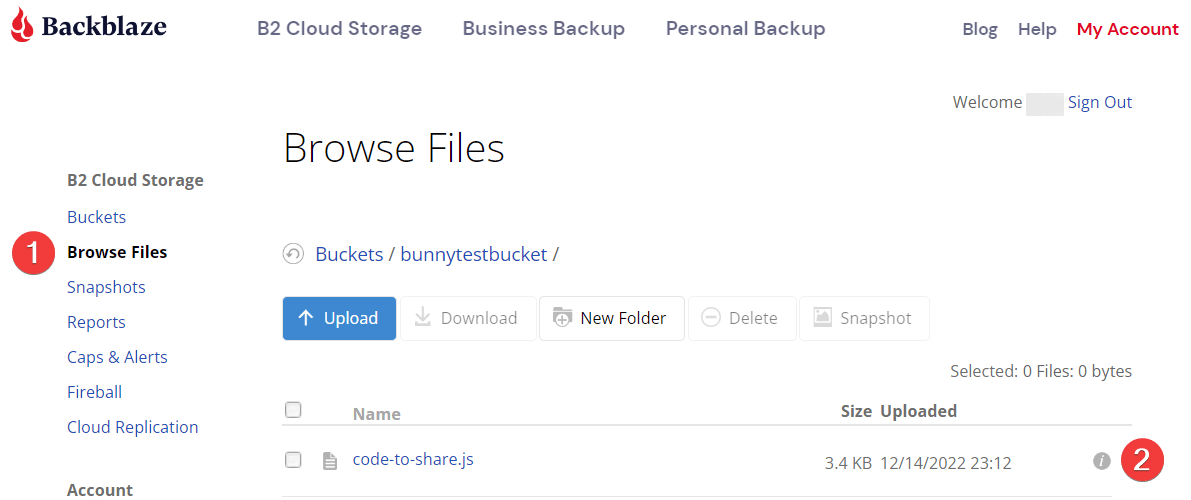
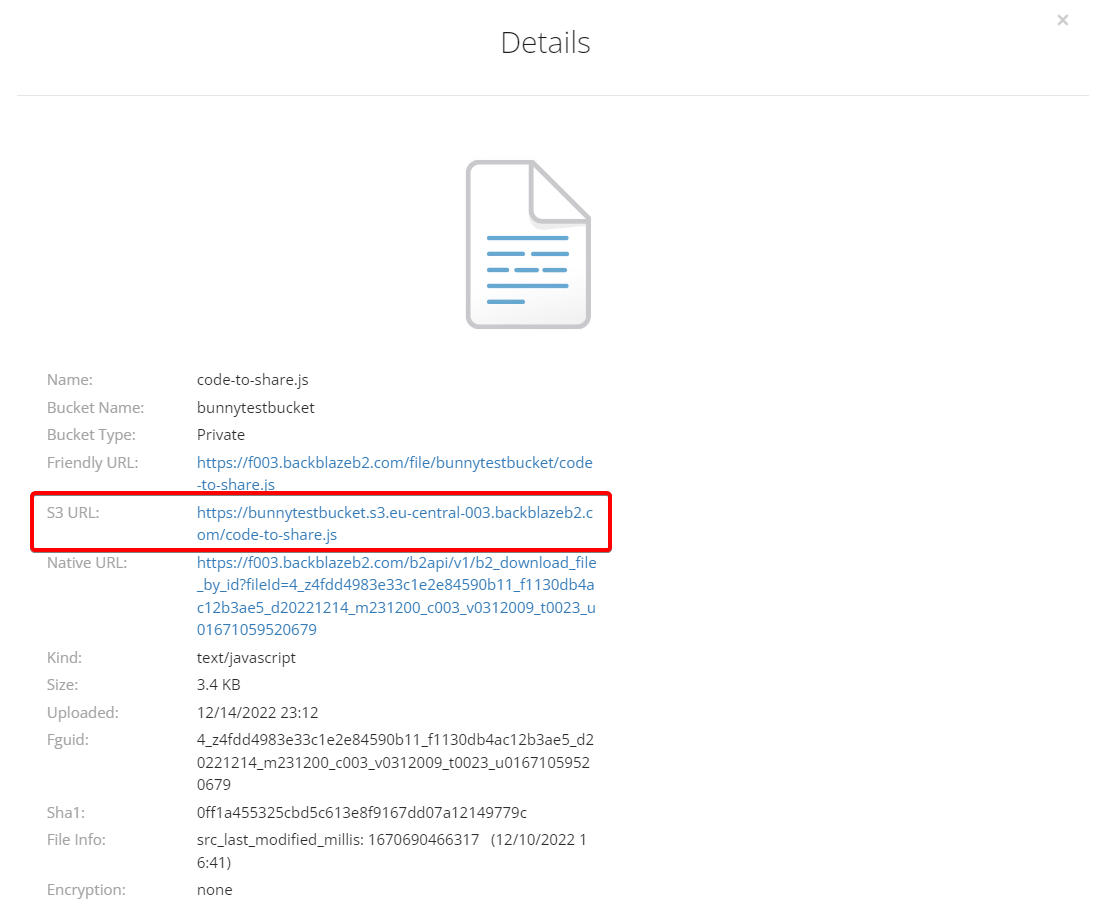
bunnytestbucket:Create a Pull Zone
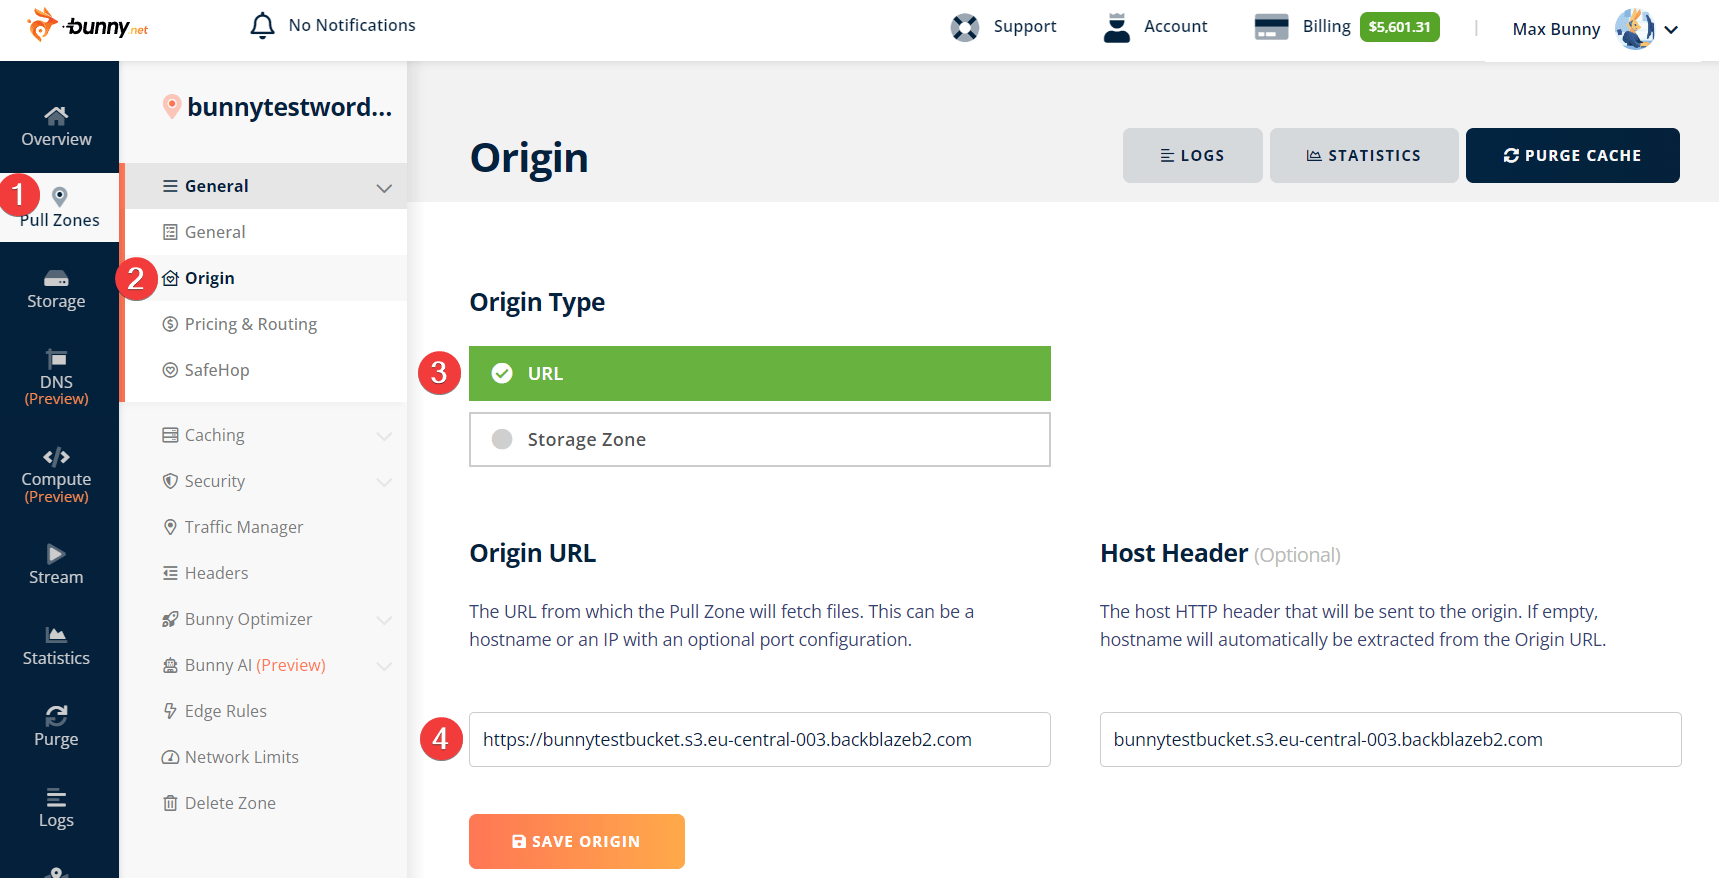
Log in to your bunny.net dashboard and open Add Pull Zone. Give it a name (this becomes your CDN hostname) and paste the S3 URL from the previous step into the Origin URL field. The Host Header is generated automatically and doesn’t need changing. For details, see How to create your first Pull Zone.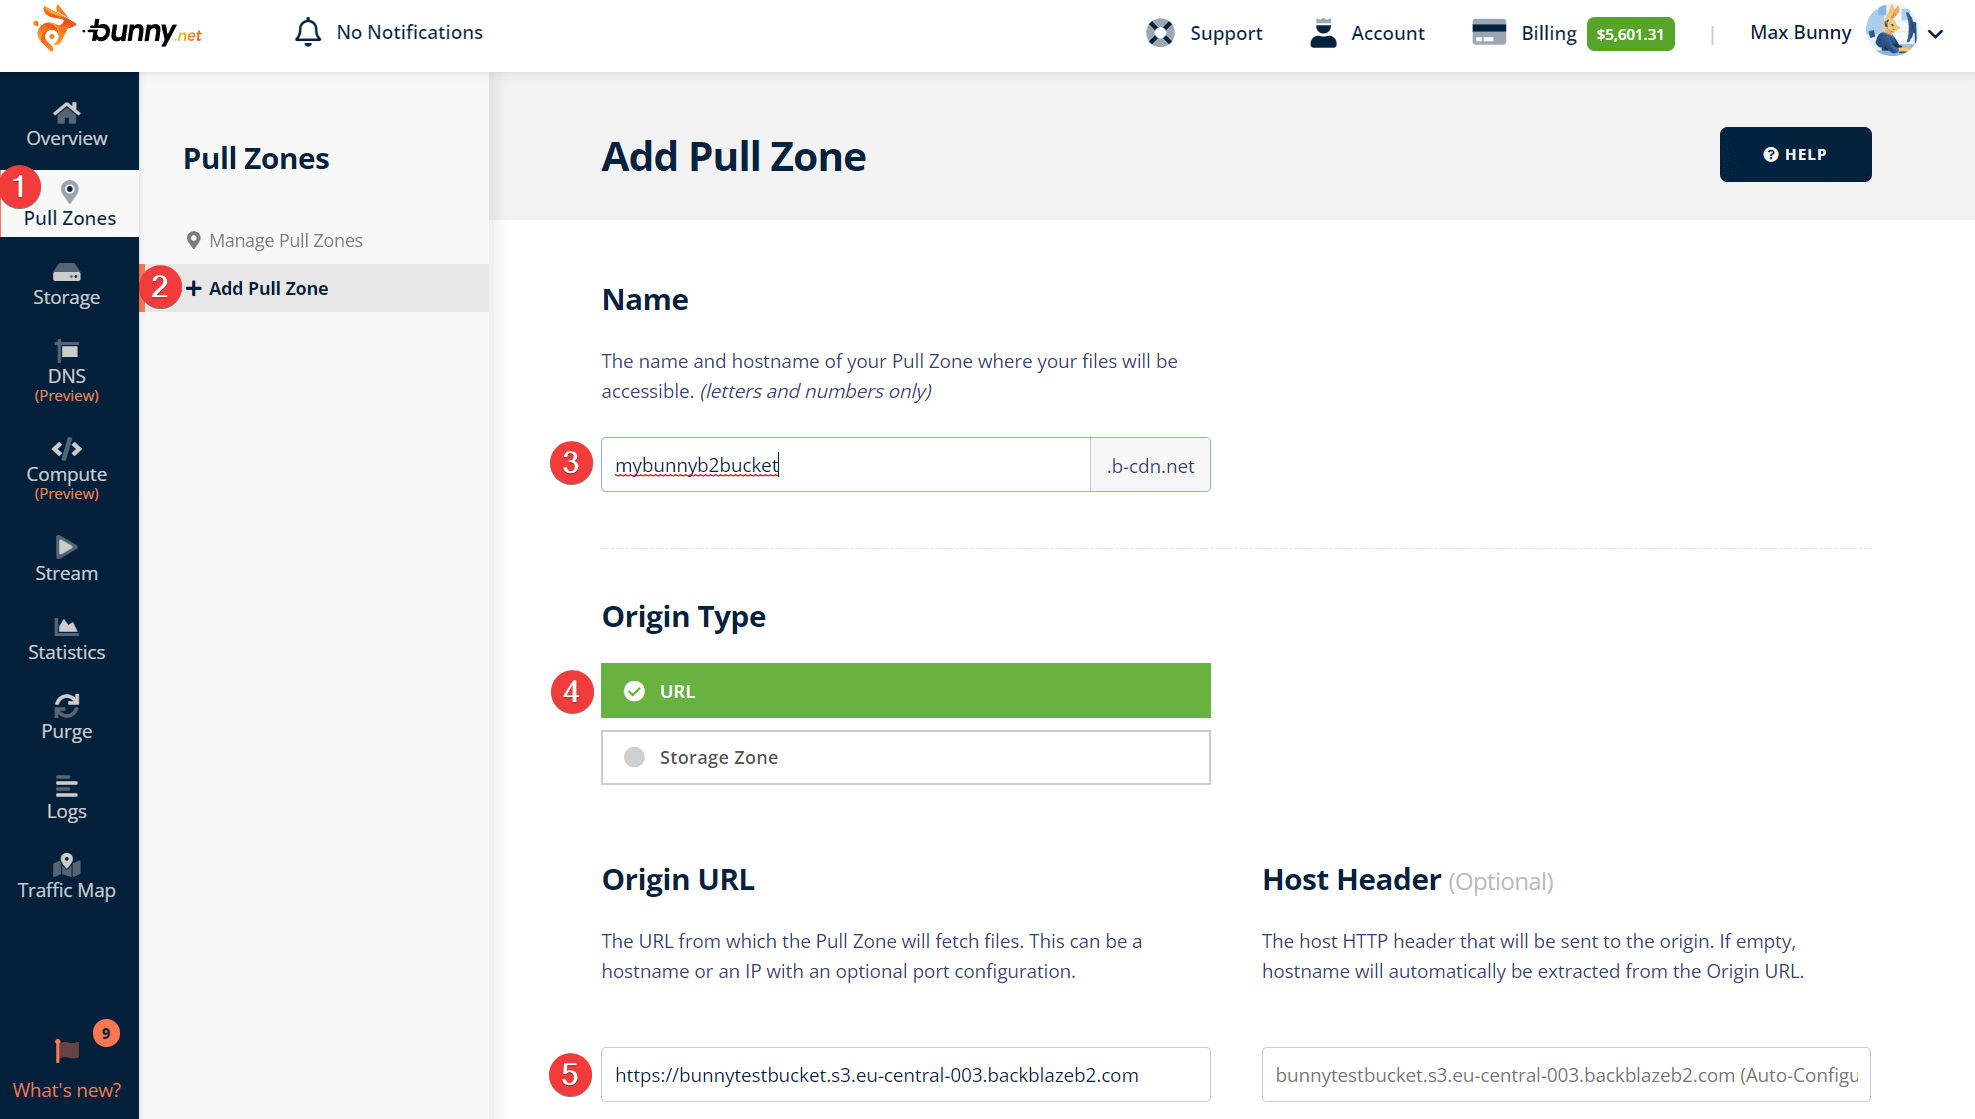
Secure the connection with S3 authentication
Open the S3 Authentication section of your Pull Zone’s Security settings and click Enable AWS S3 Authentication. Fill in the details using the keys from step 2: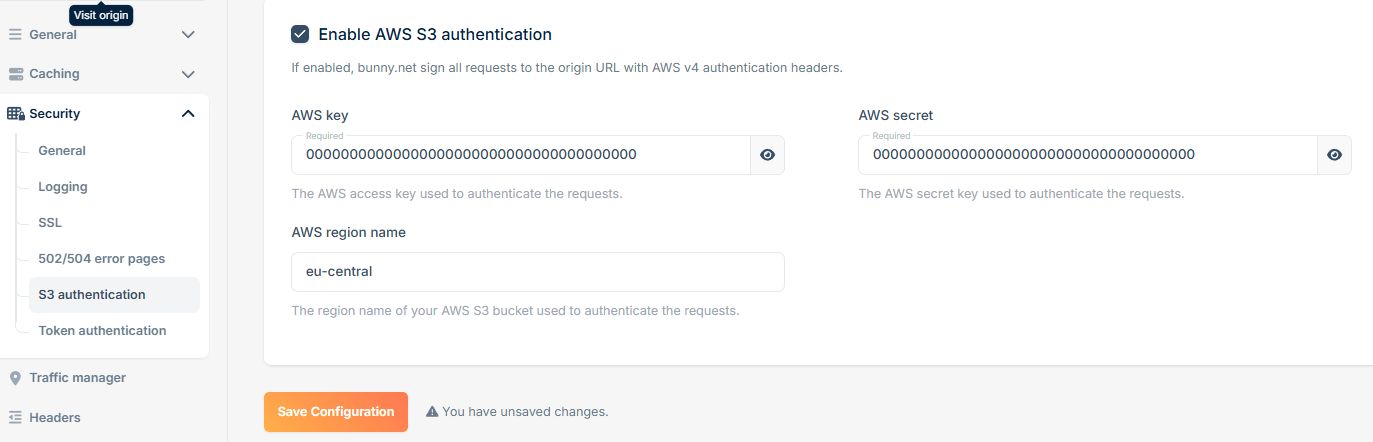
- AWS Key: your B2
keyID - AWS Secret: your B2
applicationKey - AWS Region Name: the region from your origin URL (for example,
eu-central)
Test your Pull Zone
With everything configured, request a file through your Pull Zone hostname, for example:If the file is served, your private B2 bucket is protected by S3 authentication and accelerated by Bunny CDN. Replace your existing URLs with the Bunny CDN URLs in your application to start serving cached content.