> ## Documentation Index
> Fetch the complete documentation index at: https://bunnynet-cb9733c2-support-migration.mintlify.site/llms.txt
> Use this file to discover all available pages before exploring further.
# Deploy
> Choose from Magic, Single region, or Advanced deployment options.
Magic Containers offers three deployment options: Magic deployment for effortless global provisioning, Single region for fast deployment without auto-scaling, and Advanced for full control over regions and scaling based on user activity. Before deploying, you'll need a [private container registry](/magic-containers/image-registries) configured.
# Magic deployment
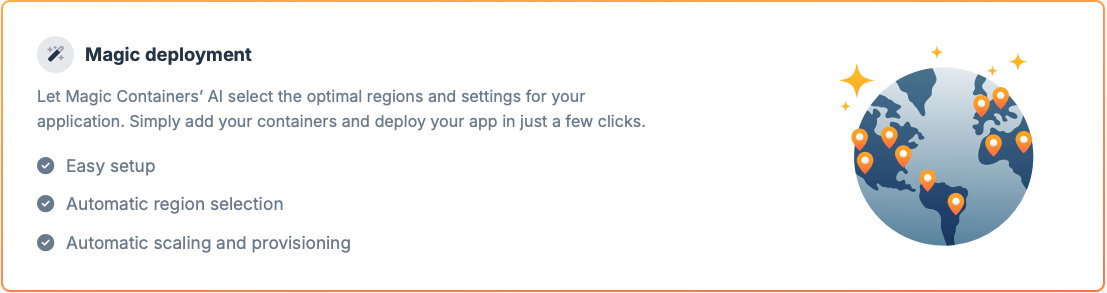 **Magic deployment** is the simplest way to get your app up and running. It leverages the power of Magic Containers AI to handle global provisioning efficiently and cost-effectively.
Magic Containers AI will automatically analyze your app's requirements, determine the optimal deployment regions, and provision your app globally in just a few clicks. This approach ensures the best possible performance while minimizing costs.
# Single region deployment
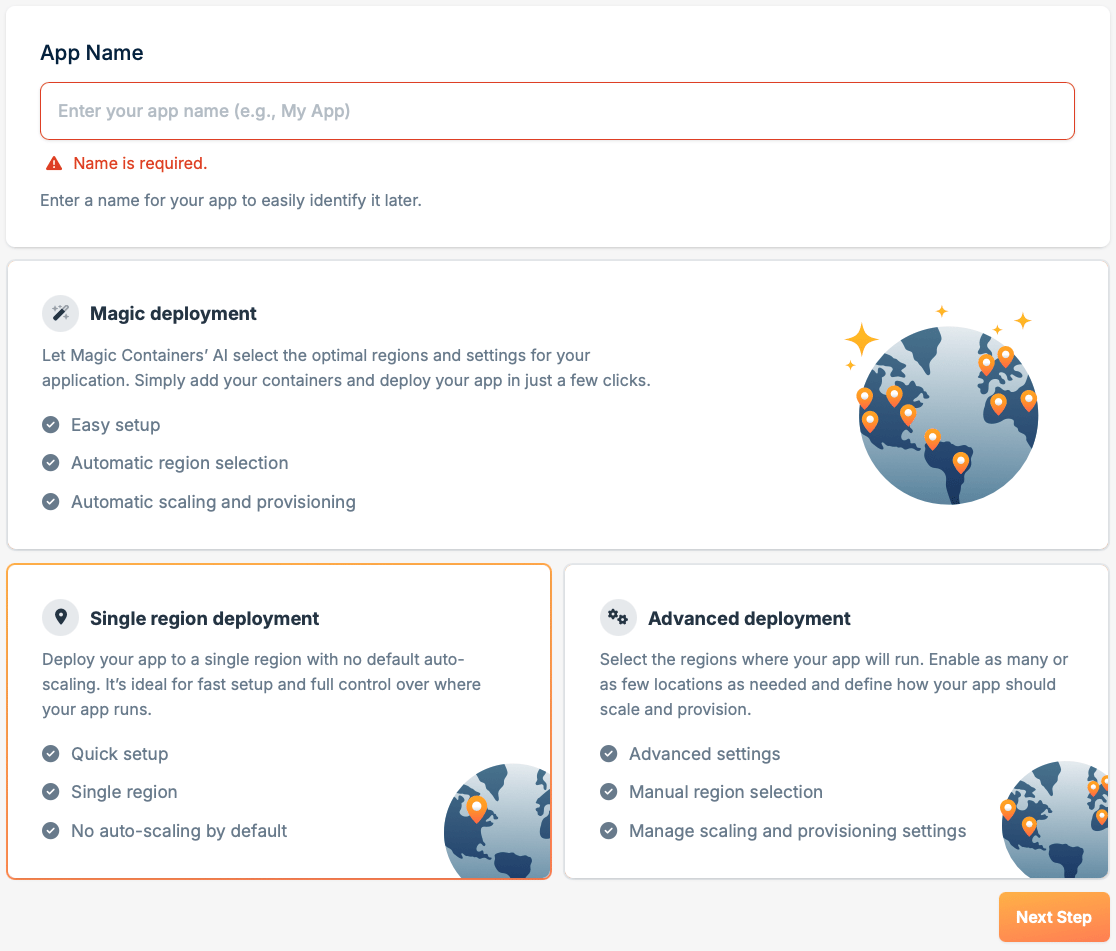
**Single region deployment** gives you full control over provisioning settings, allowing you to deploy to the closest single region without the worry of any scaling. This is ideal for scenarios where you are wanting fast deployment and no auto-scaling.
Login to [bunny.net dashboard](https://dash.bunny.net/auth/login?pk_buttonlocation=menu).
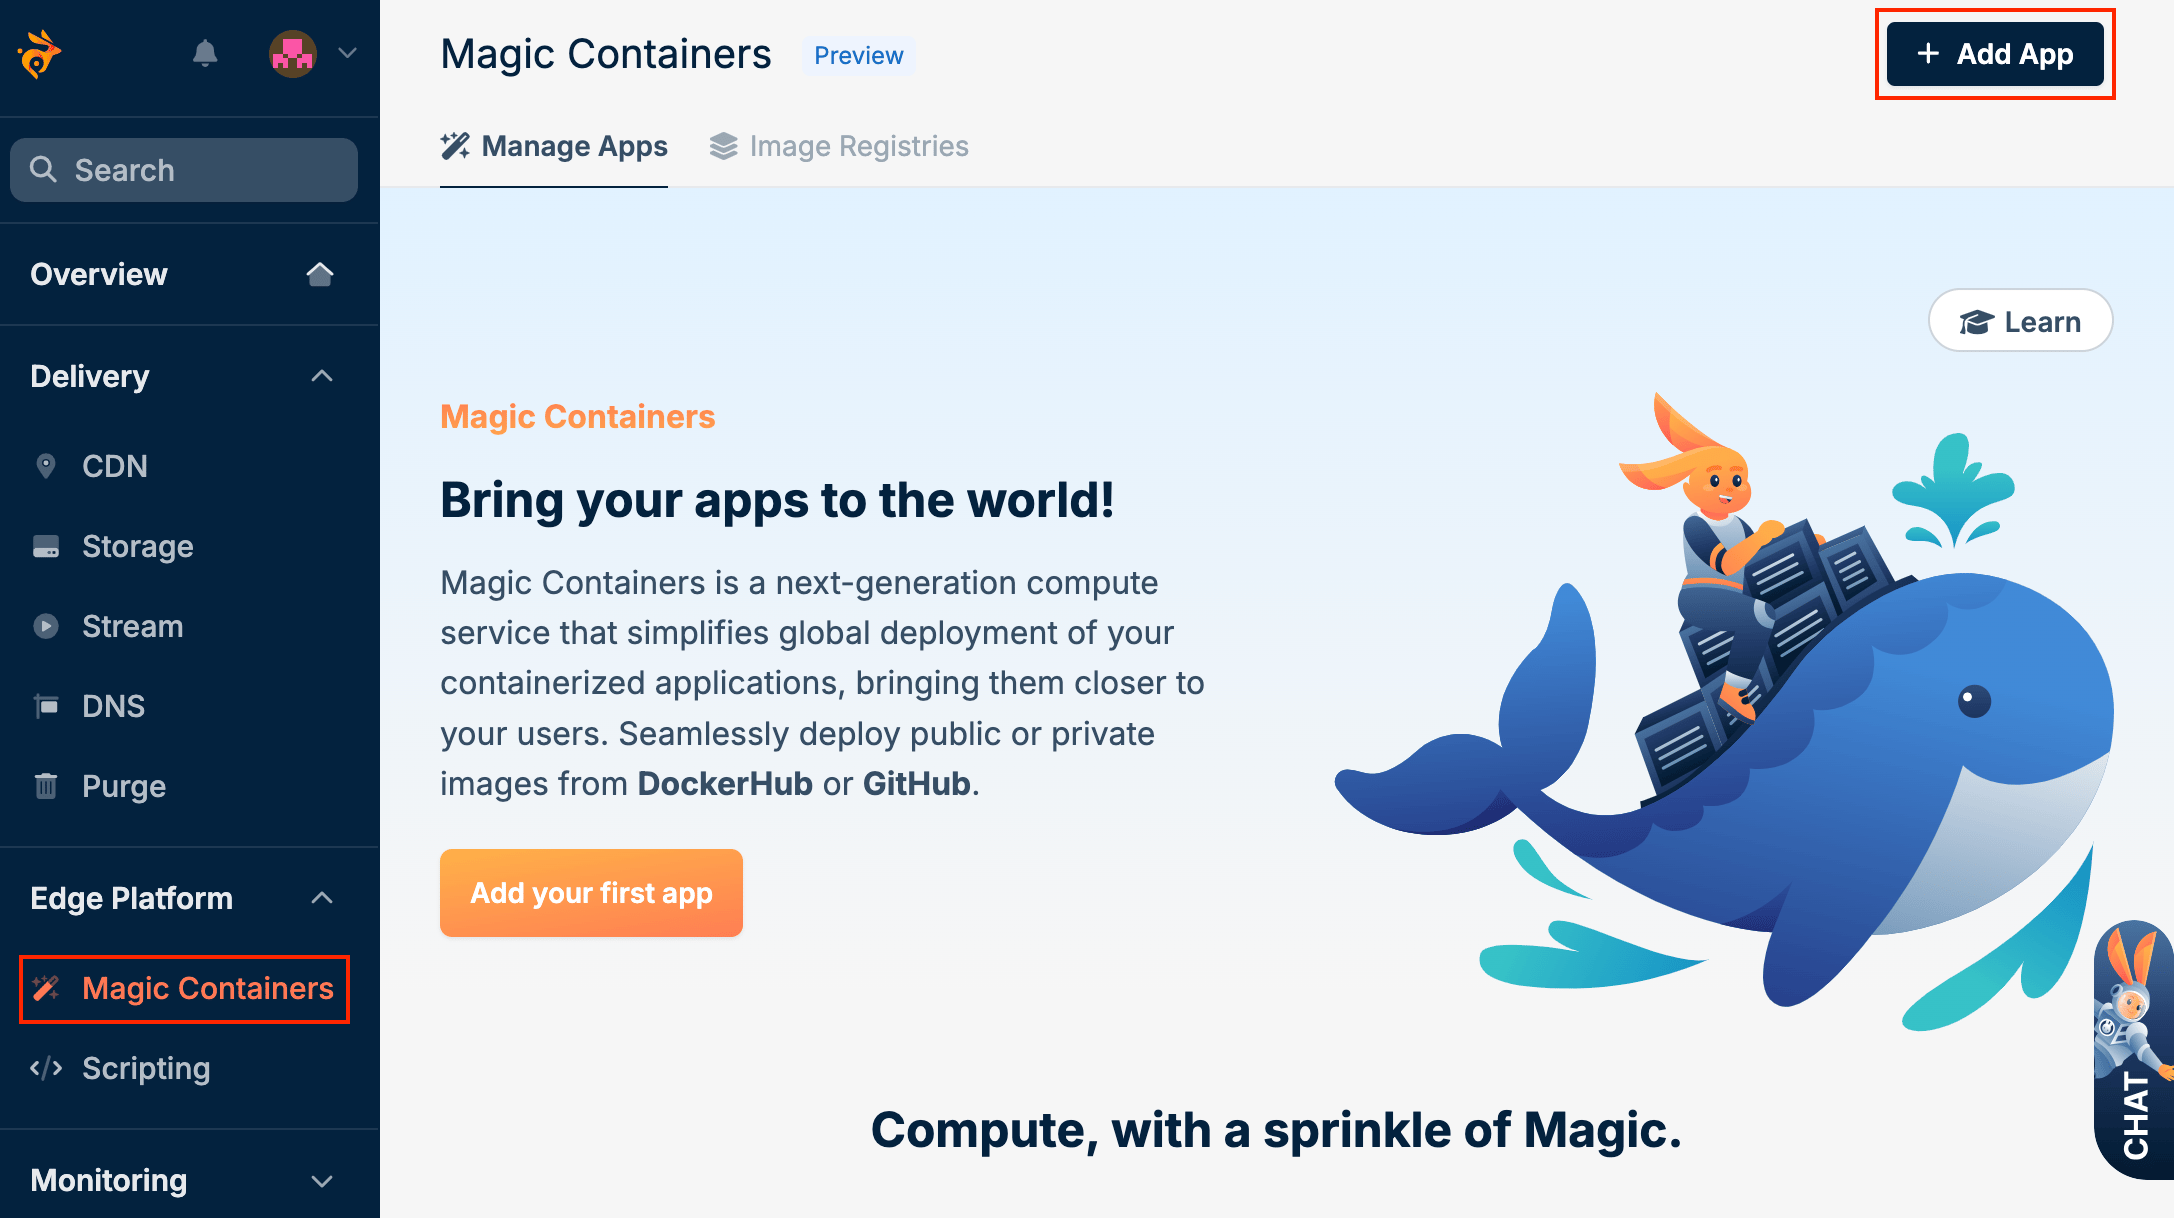
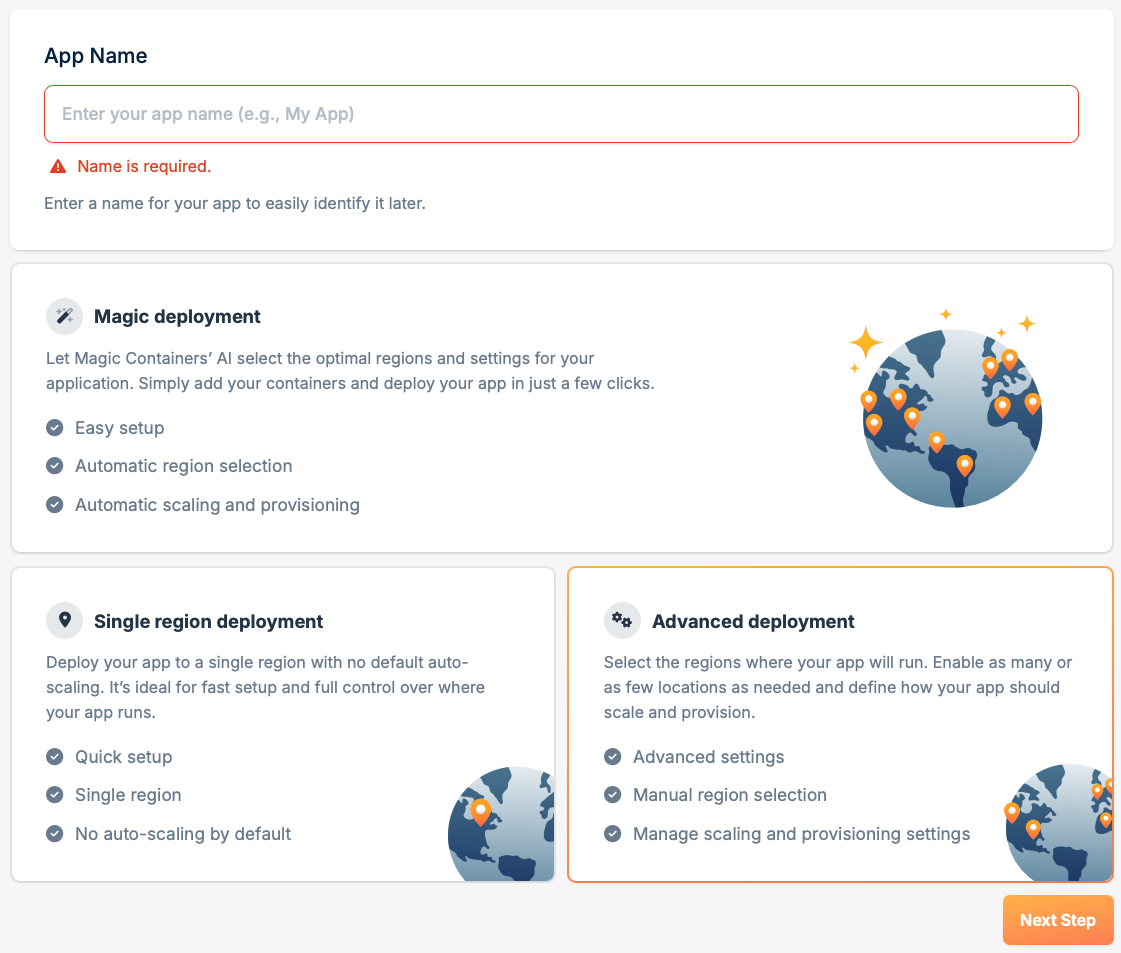
Select **Magic Containers** and click the **Add App** button.
**Magic deployment** is the simplest way to get your app up and running. It leverages the power of Magic Containers AI to handle global provisioning efficiently and cost-effectively.
Magic Containers AI will automatically analyze your app's requirements, determine the optimal deployment regions, and provision your app globally in just a few clicks. This approach ensures the best possible performance while minimizing costs.
# Single region deployment
**Single region deployment** gives you full control over provisioning settings, allowing you to deploy to the closest single region without the worry of any scaling. This is ideal for scenarios where you are wanting fast deployment and no auto-scaling.
Login to [bunny.net dashboard](https://dash.bunny.net/auth/login?pk_buttonlocation=menu).
Select **Magic Containers** and click the **Add App** button.
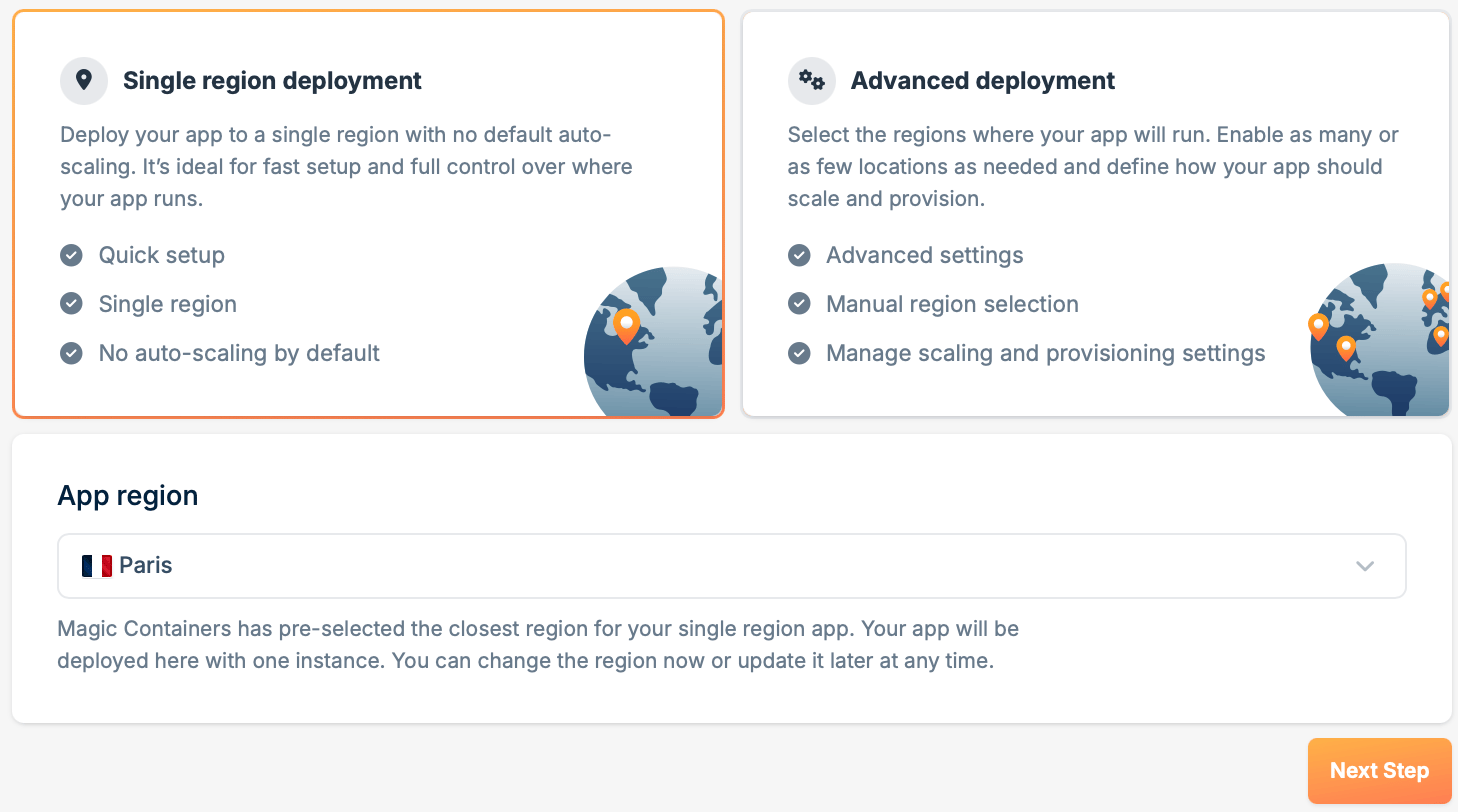
 Select the **Single region deployment** option, define the name of your app, and click **Next Step**.
 After selecting Single region deployment, configure your **App region**. You will be presented with your closest region preselected and a list of all available regions.
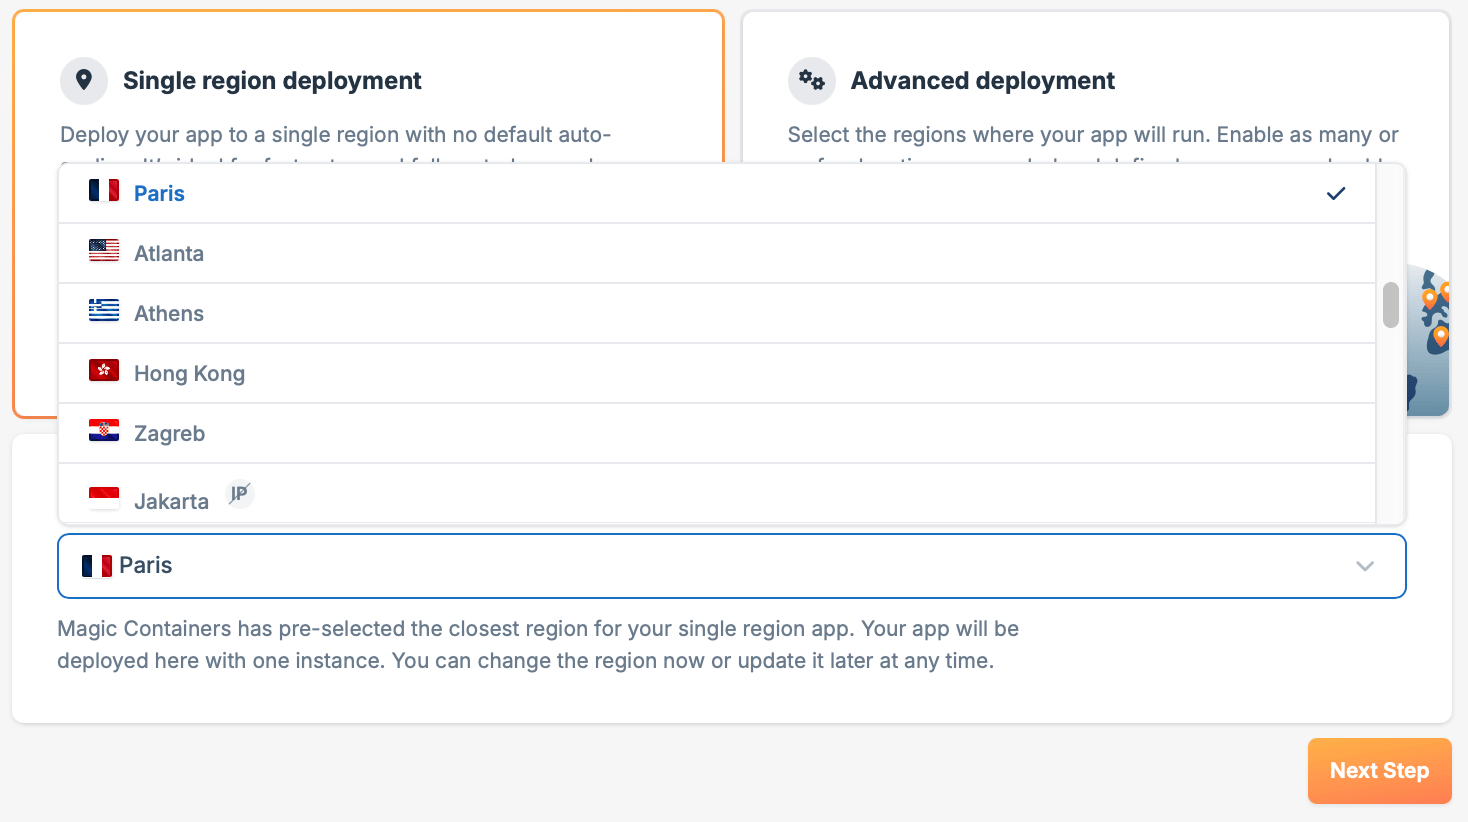 After configuring the **App region** settings, click **Next Step.**
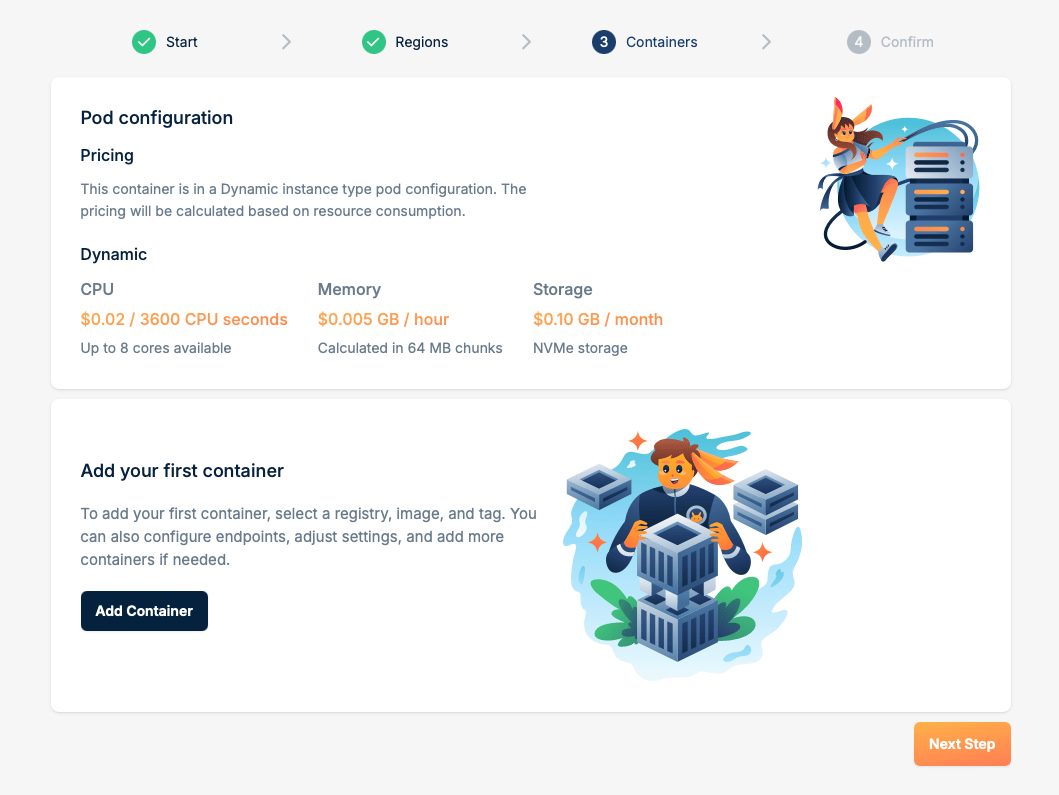
 Click **Add Container**.
 If you want your app to be available on the internet, you need to set up edge endpoints. Go to the **Endpoints** tab and click **Add New Endpoint**.
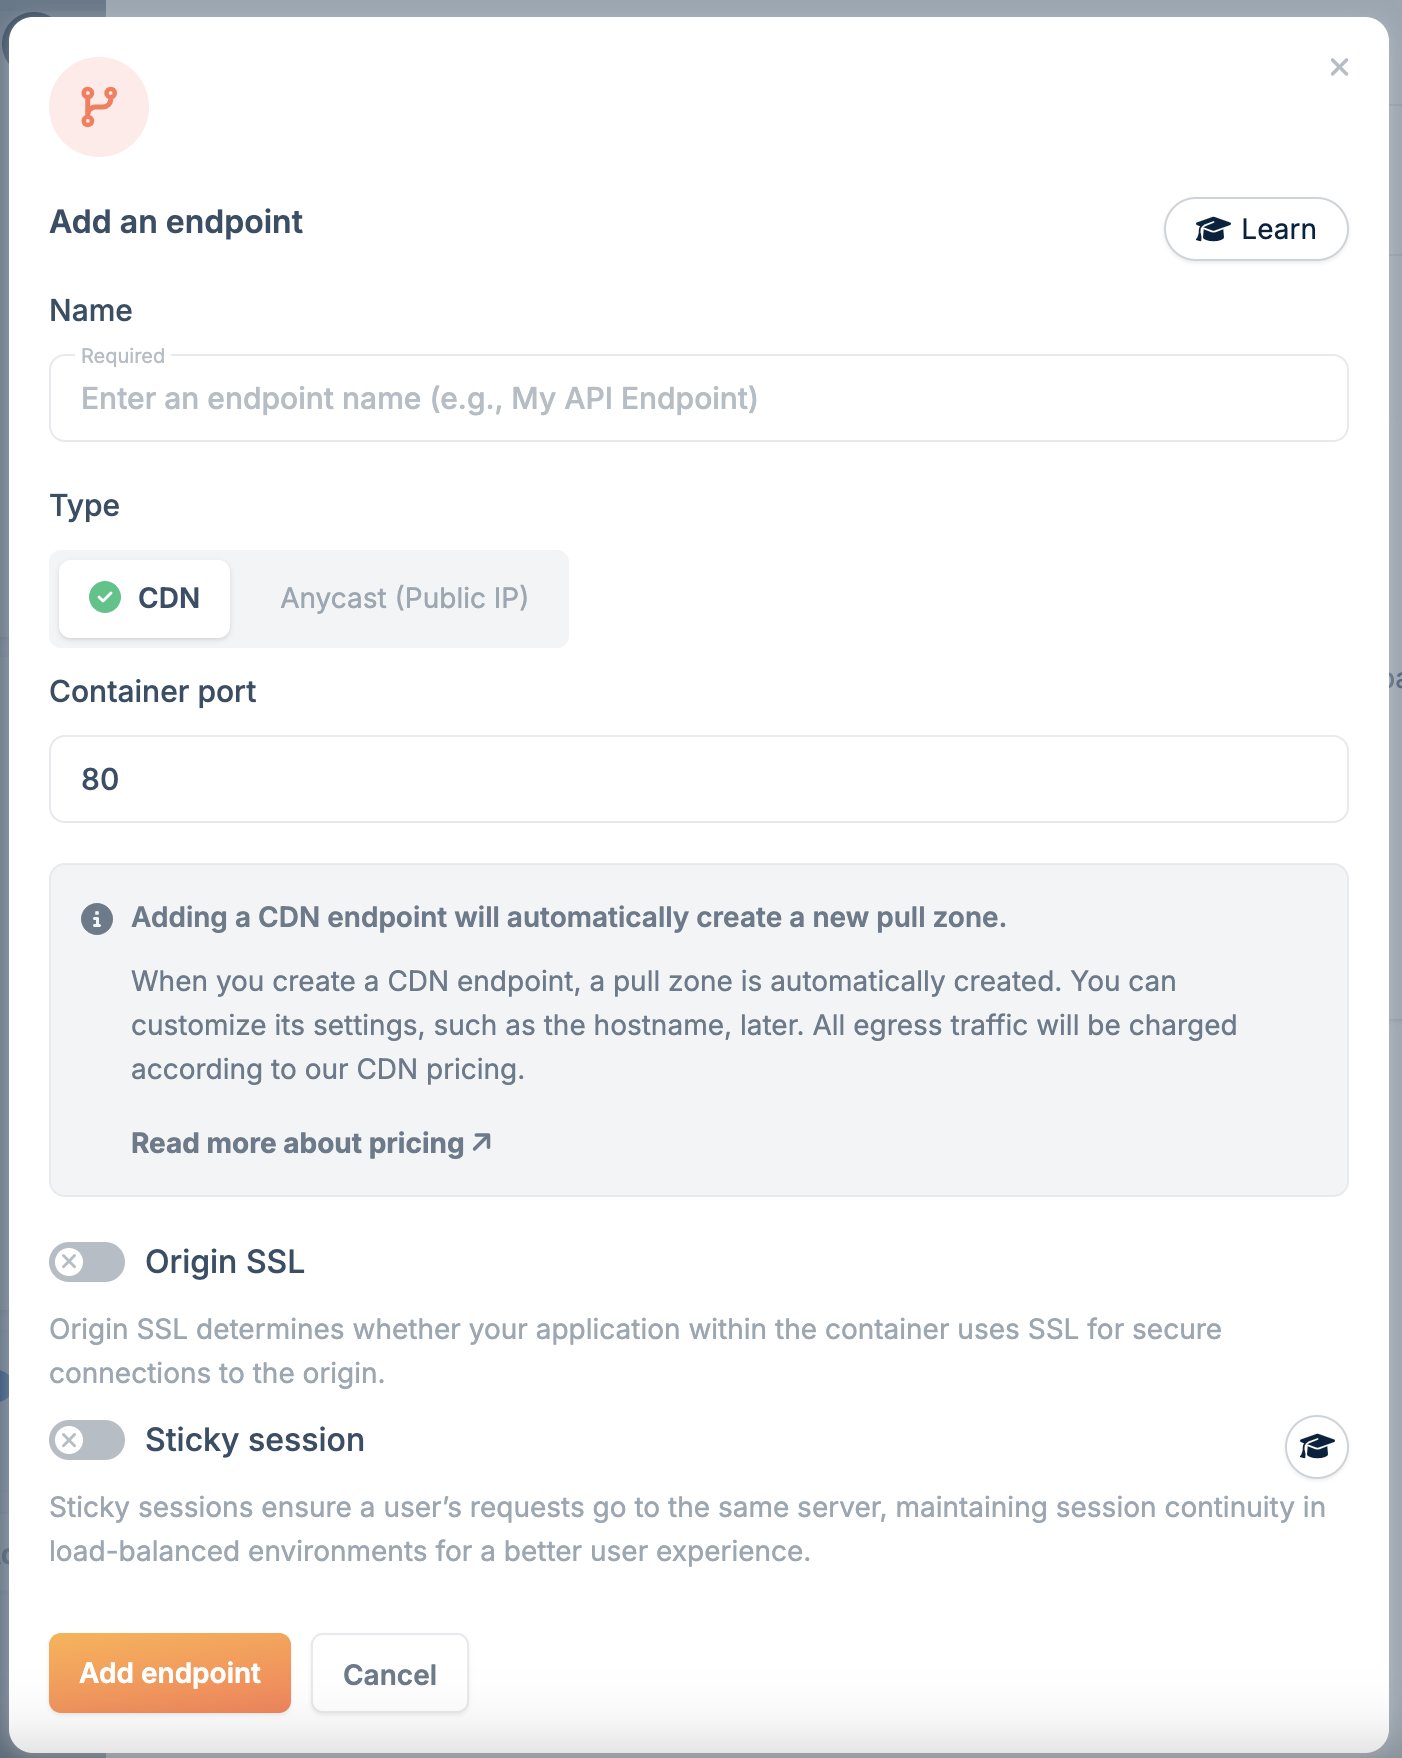 * You need to name the endpoint (it must have a unique name).
* Decide how you want to expose the app, either using CDN or Anycast.
* Define the container port, which is the port on which the application is listening inside the container.
* Specify whether your application inside the container uses SSL for origin (only CDN setting).
Click **Add endpoint**, and then click **Add Container**.
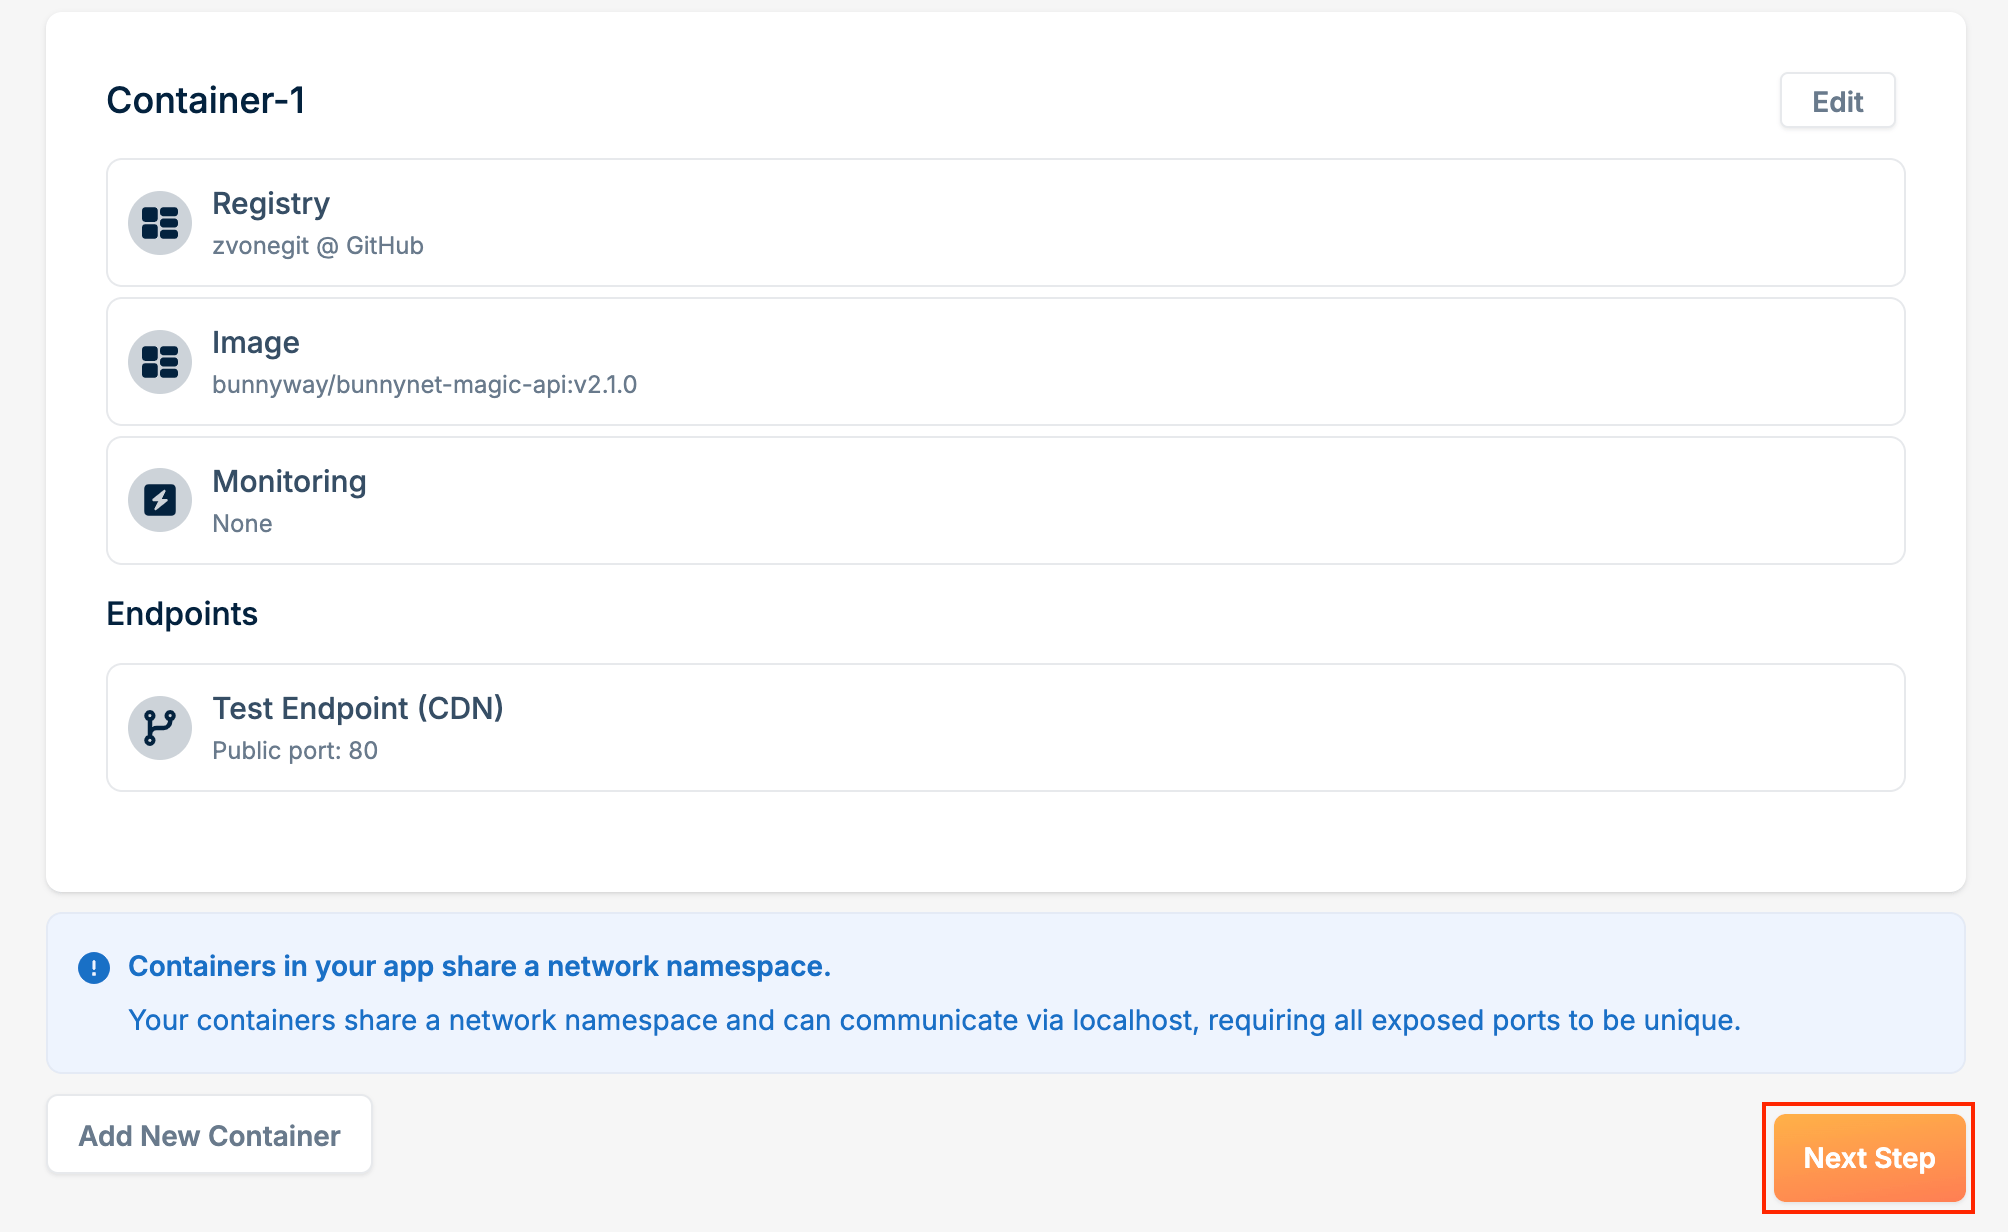
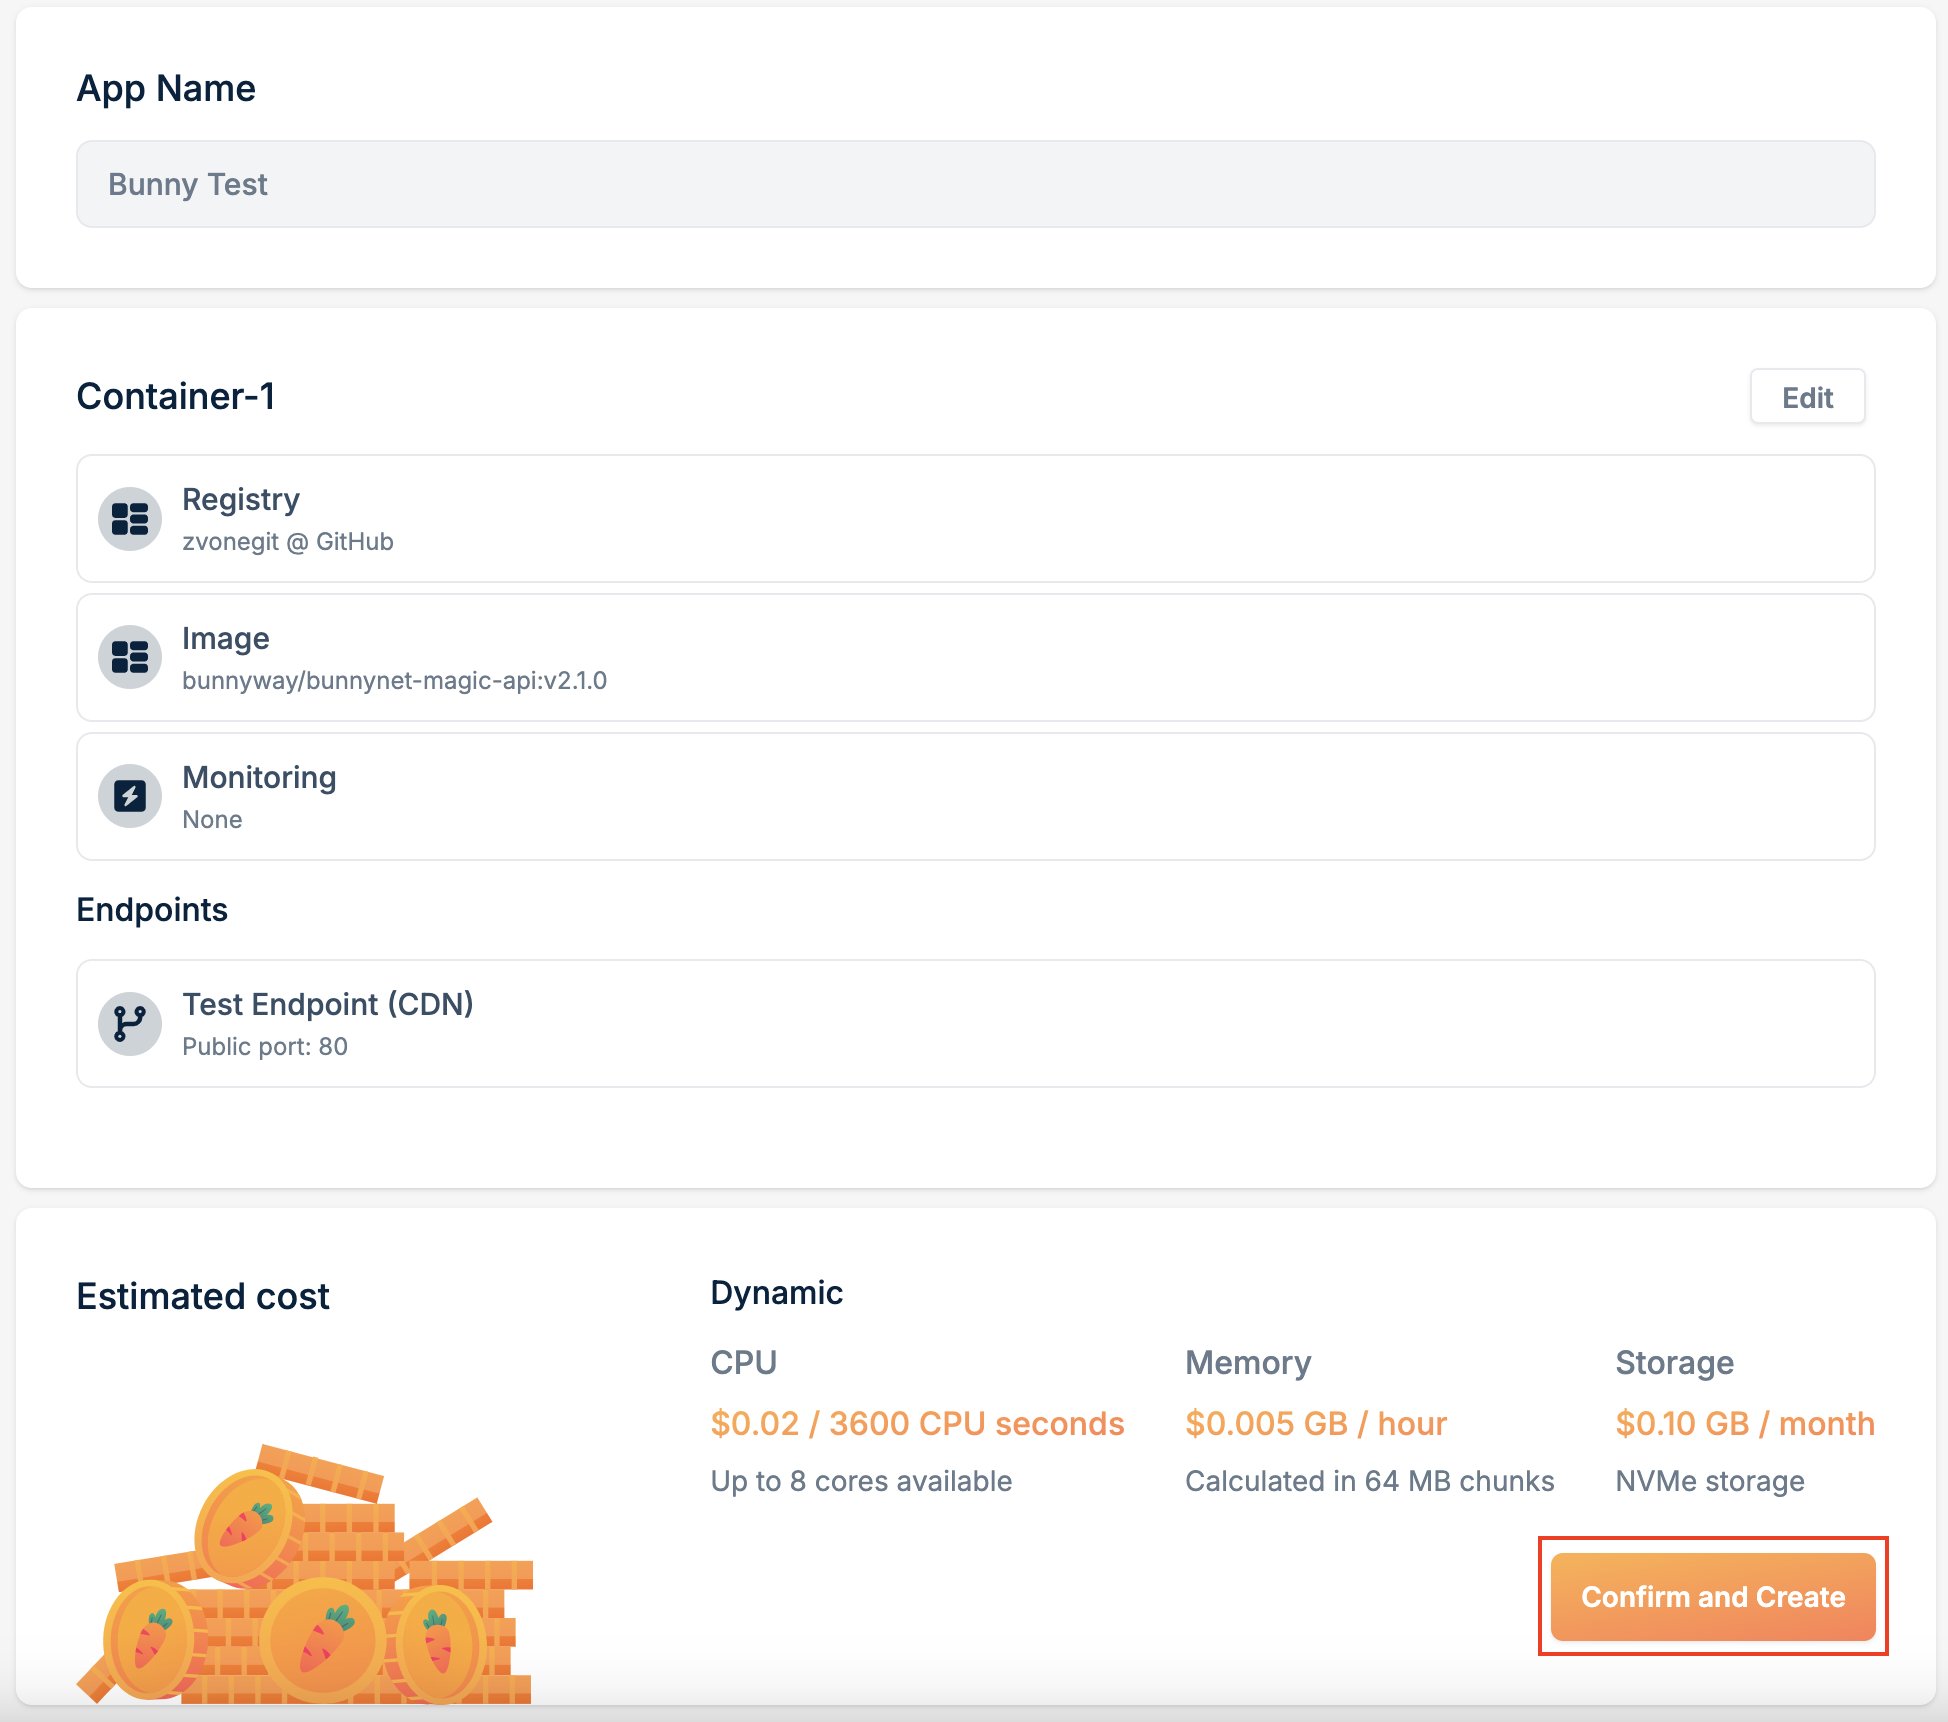
Review your settings. If everything looks good, click **Next Step**.
* You need to name the endpoint (it must have a unique name).
* Decide how you want to expose the app, either using CDN or Anycast.
* Define the container port, which is the port on which the application is listening inside the container.
* Specify whether your application inside the container uses SSL for origin (only CDN setting).
Click **Add endpoint**, and then click **Add Container**.
Review your settings. If everything looks good, click **Next Step**.
 Click **Confirm and Create**.
 You will be navigated to the overview screen of your app. The processing button should turn green, indicating that your app is being deployed.
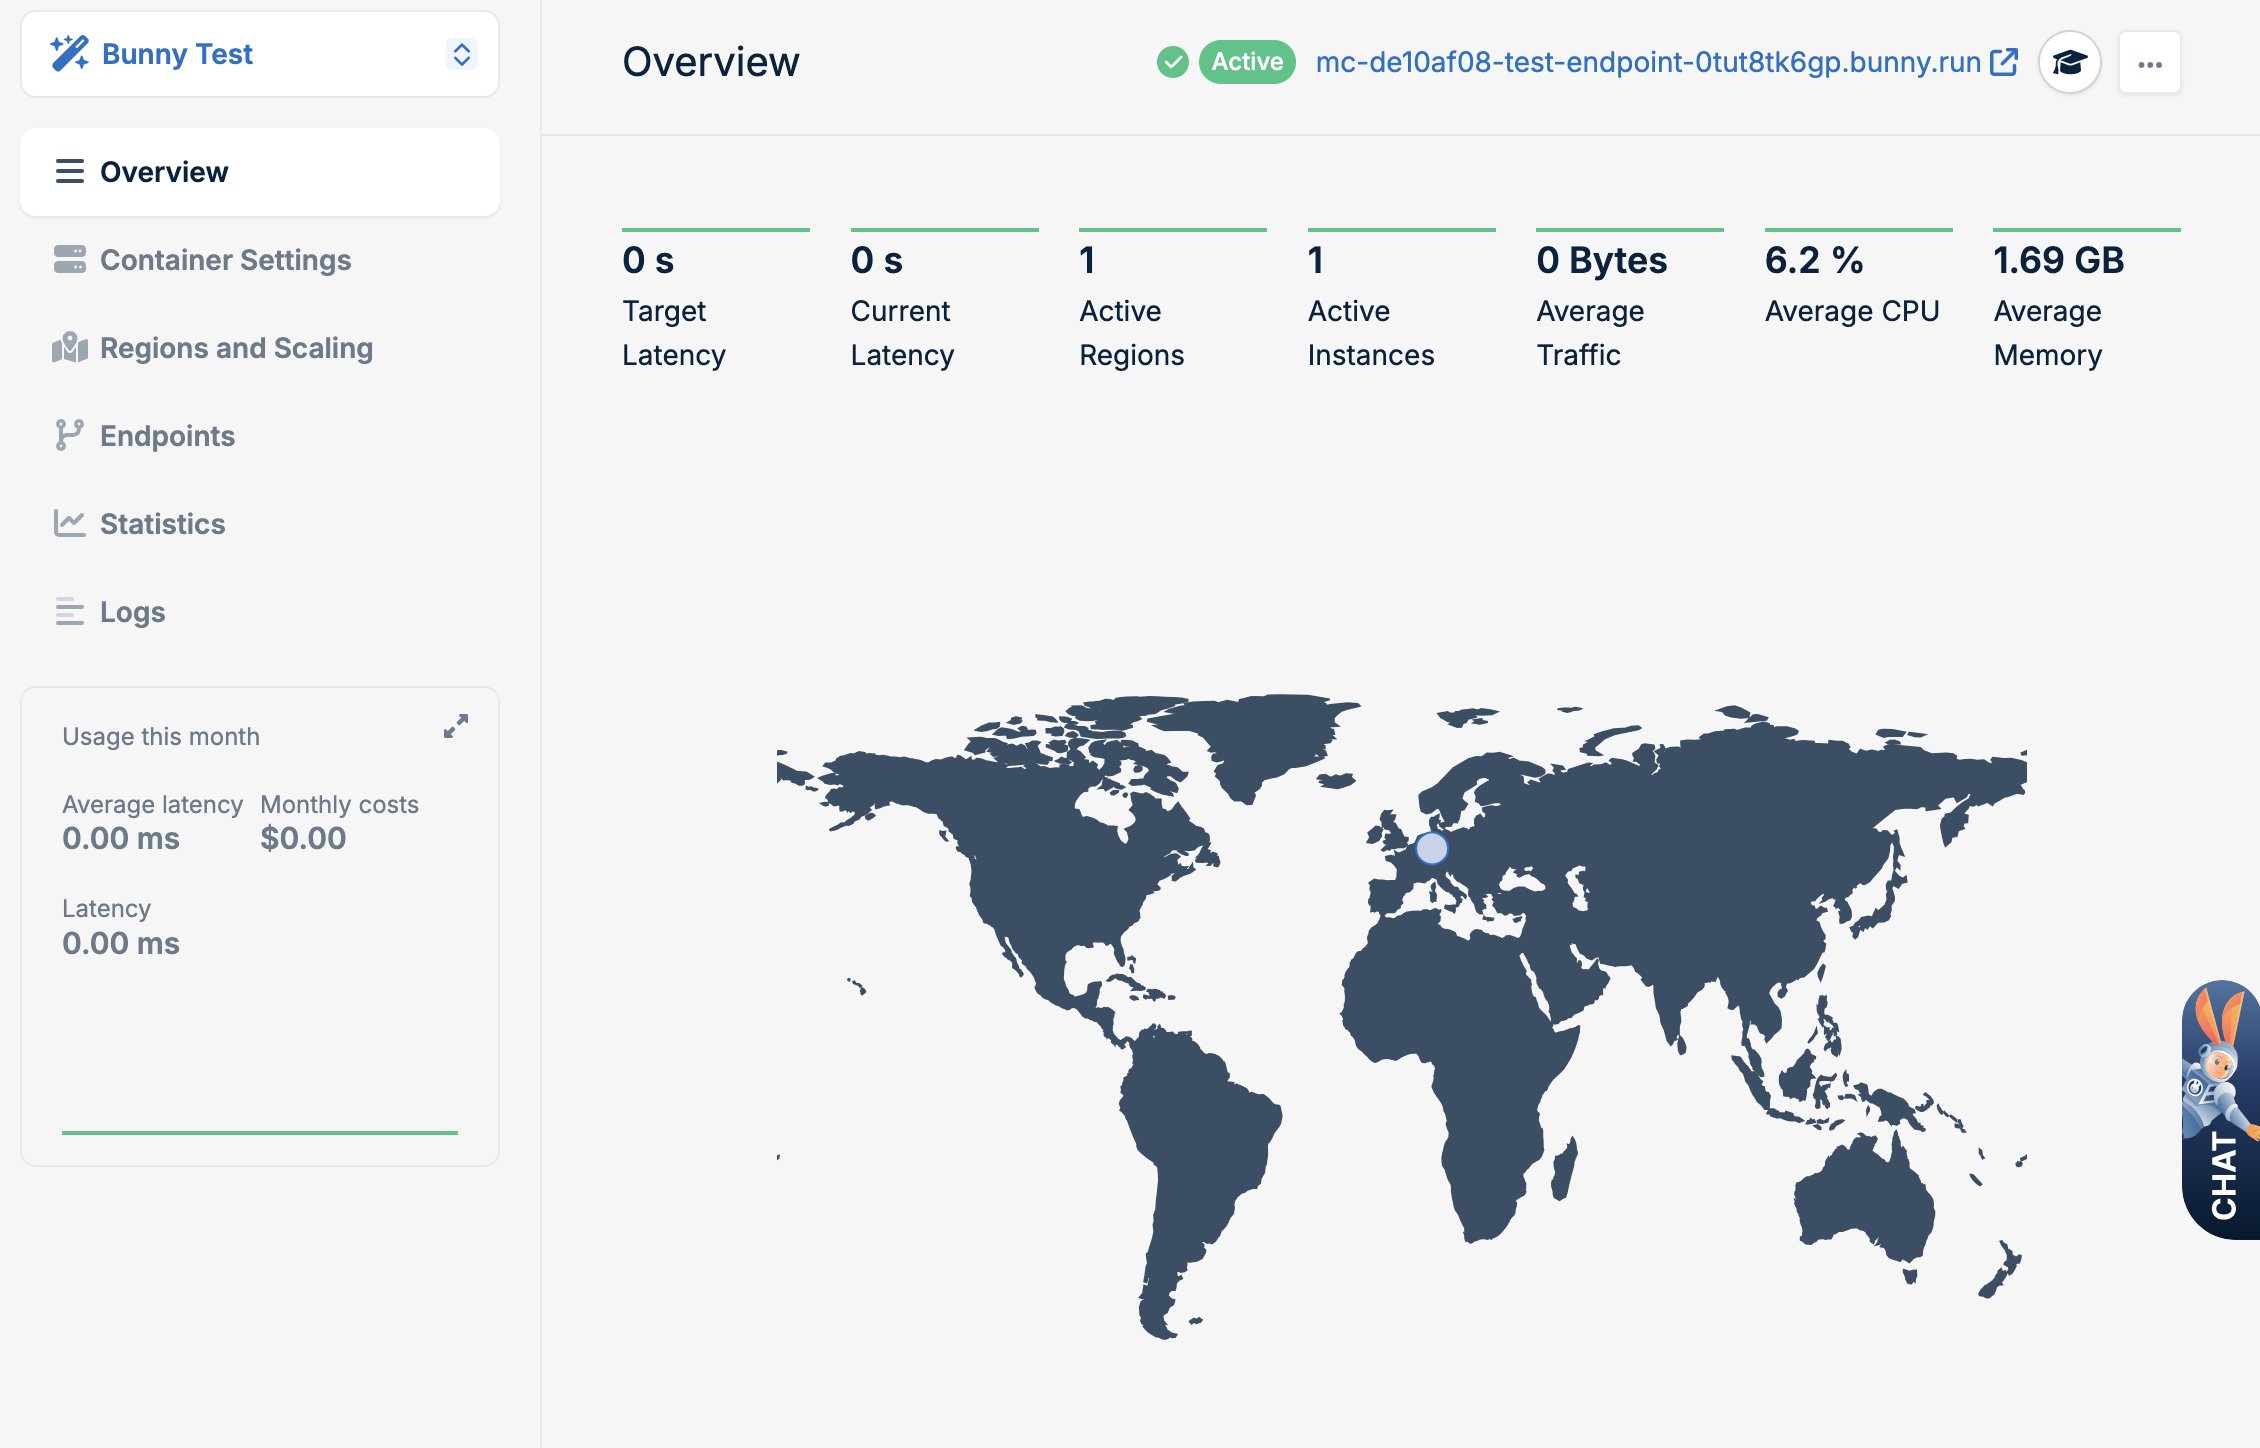 Your application is now deployed and can be accessed by clicking here:
 The provisioner will take your region settings into account and deploy your app accordingly.
# Advanced deployment
The provisioner will take your region settings into account and deploy your app accordingly.
# Advanced deployment
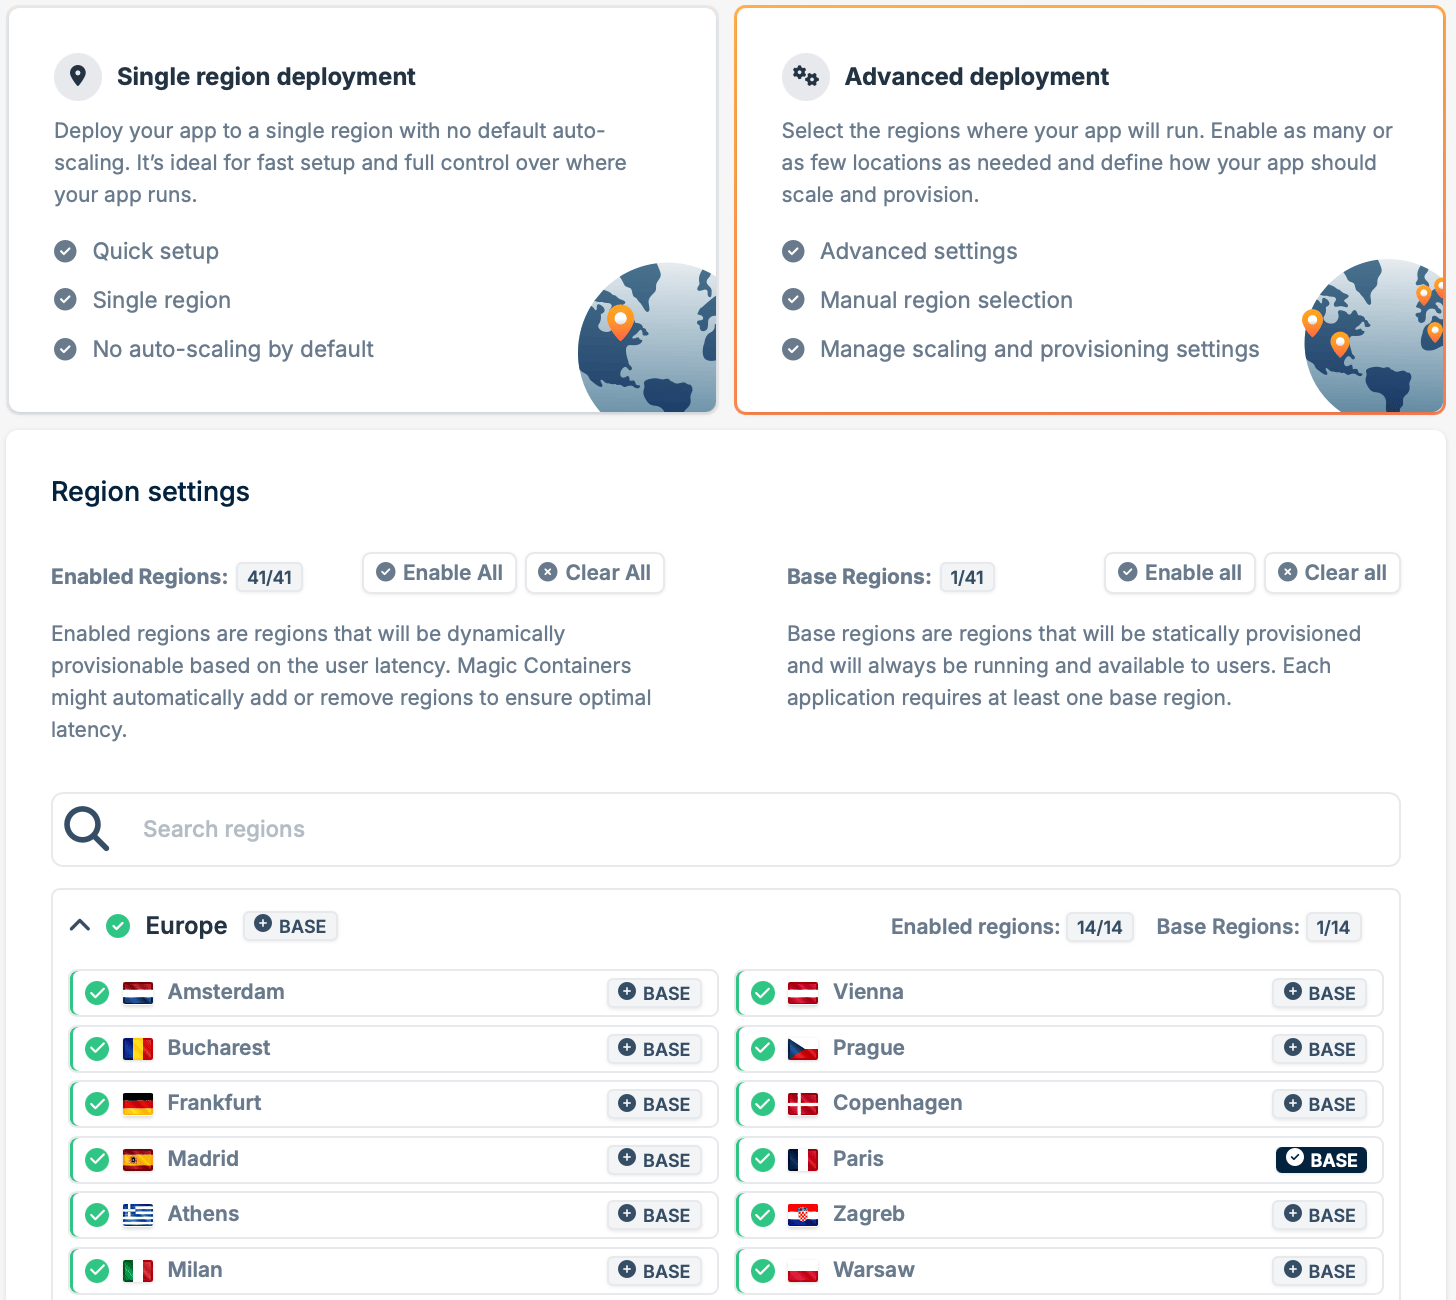
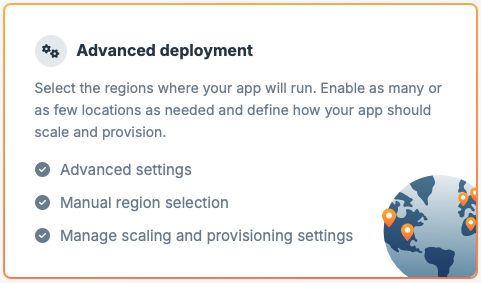 **Advanced deployment** gives you full control over provisioning settings, allowing you to customize the deployment regions and react to user activity. This level of customization is ideal for scenarios where you have specific geographical requirements or want to optimize your deployment strategy based on user behavior.
Login to [bunny.net dashboard](https://dash.bunny.net/auth/login?pk_buttonlocation=menu).
Select **Magic Containers** and click the **Add App** button.
Select the **Advanced deployment** option, define the name of your app, and click **Next Step**.
**Advanced deployment** gives you full control over provisioning settings, allowing you to customize the deployment regions and react to user activity. This level of customization is ideal for scenarios where you have specific geographical requirements or want to optimize your deployment strategy based on user behavior.
Login to [bunny.net dashboard](https://dash.bunny.net/auth/login?pk_buttonlocation=menu).
Select **Magic Containers** and click the **Add App** button.
Select the **Advanced deployment** option, define the name of your app, and click **Next Step**.
 You will be presented with a list of all available regions. For each region, you can set whether it is a base region or a standard region:
* **Base region**: Regions where your app will always be deployed. You must select at least one base region and there is no maximum limit.
* **Enabled region**: The provisioning system will actively monitor user locations and behavior. If it identifies active users in a specific region, it will dynamically deploy the app to accommodate the user traffic. Conversely, if there is no user activity in a region, the app will not be deployed in that area.
You will be presented with a list of all available regions. For each region, you can set whether it is a base region or a standard region:
* **Base region**: Regions where your app will always be deployed. You must select at least one base region and there is no maximum limit.
* **Enabled region**: The provisioning system will actively monitor user locations and behavior. If it identifies active users in a specific region, it will dynamically deploy the app to accommodate the user traffic. Conversely, if there is no user activity in a region, the app will not be deployed in that area.
 Based on your settings, the provisioner will react to user activity as follows:
* If the **Enabled Regions** and **Base Regions** are equal, the provisioner will use Static Provisioning. In this mode, the regions deployed over time will remain the same.
* If the sets are different, the provisioner will use **Auto Provisioning**. Regions are chosen based on end-user activity. If users are active in a region, the app will be deployed there. If there are no active users in a region, the app won't be deployed.
After configuring the region settings, click **Next Step.**
Set the minimum and maximum number of instances (maximum is 10), and click **Add New Container**.
Based on your settings, the provisioner will react to user activity as follows:
* If the **Enabled Regions** and **Base Regions** are equal, the provisioner will use Static Provisioning. In this mode, the regions deployed over time will remain the same.
* If the sets are different, the provisioner will use **Auto Provisioning**. Regions are chosen based on end-user activity. If users are active in a region, the app will be deployed there. If there are no active users in a region, the app won't be deployed.
After configuring the region settings, click **Next Step.**
Set the minimum and maximum number of instances (maximum is 10), and click **Add New Container**.
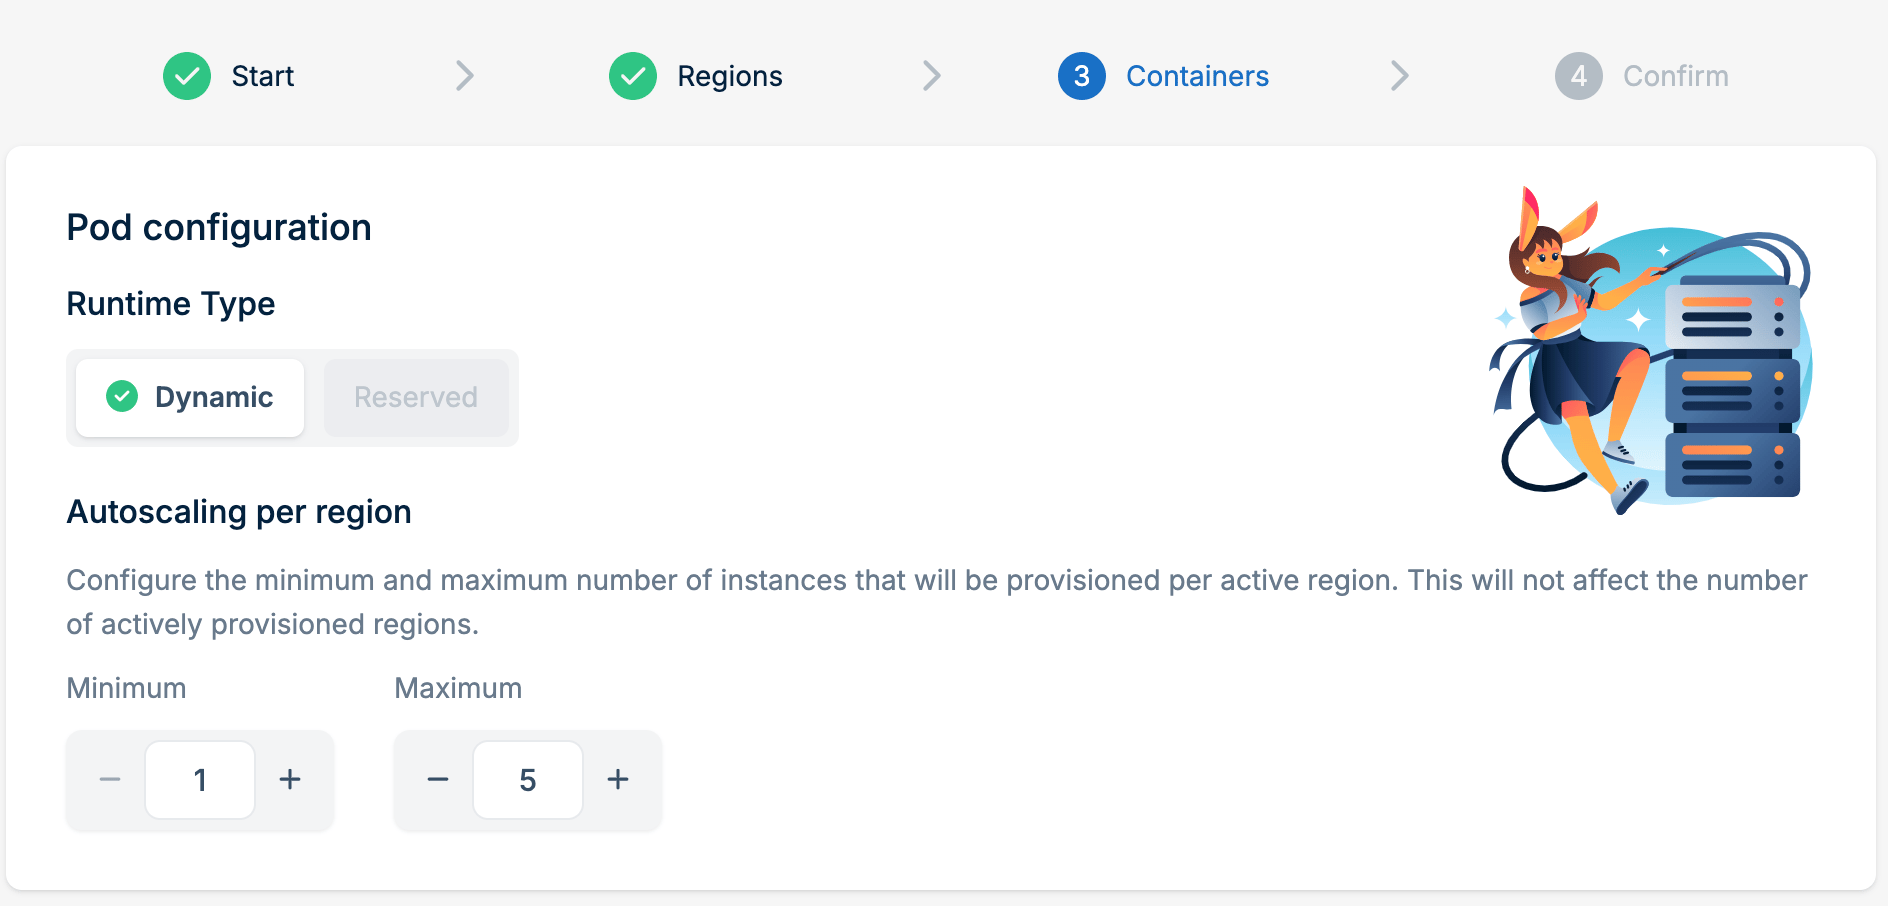 Select the provisioning type.
 If you want your app to be available on the internet, you need to set up edge endpoints. Go to the **Endpoints** tab and click **Add New Endpoint**.
* You need to name the endpoint (it must have a unique name).
* Decide how you want to expose the app, either using CDN or Anycast.
* Define the container port, which is the port on which the application is listening inside the container.
* Specify whether your application inside the container uses SSL for origin (only CDN setting).
Click **Add endpoint**, and then click **Add Container**.
Review your settings. If everything looks good, click **Next Step**.
Click **Confirm and Create**.
You will be navigated to the overview screen of your app. The processing button should turn green, indicating that your app is being deployed.
Your application is now deployed and can be accessed by clicking here:
The provisioner will take your region settings into account and deploy your app accordingly.
If you want your app to be available on the internet, you need to set up edge endpoints. Go to the **Endpoints** tab and click **Add New Endpoint**.
* You need to name the endpoint (it must have a unique name).
* Decide how you want to expose the app, either using CDN or Anycast.
* Define the container port, which is the port on which the application is listening inside the container.
* Specify whether your application inside the container uses SSL for origin (only CDN setting).
Click **Add endpoint**, and then click **Add Container**.
Review your settings. If everything looks good, click **Next Step**.
Click **Confirm and Create**.
You will be navigated to the overview screen of your app. The processing button should turn green, indicating that your app is being deployed.
Your application is now deployed and can be accessed by clicking here:
The provisioner will take your region settings into account and deploy your app accordingly.