> ## Documentation Index
> Fetch the complete documentation index at: https://bunnynet-cb9733c2-support-migration.mintlify.site/llms.txt
> Use this file to discover all available pages before exploring further.
# WP Rocket
> Set up bunny.net CDN with WordPress using the WP Rocket caching plugin.
This guide walks you through configuring bunny.net CDN on your WordPress site using WP Rocket.
Log in to your [bunny.net dashboard](https://dash.bunny.net), create a new Pull Zone, and set the origin URL to your WordPress site. For more details, see [How to create your first Pull Zone](/cdn/quickstart).
Purchase and download the WP Rocket plugin from their website. In your WordPress admin, go to **Plugins → Add New**, upload the ZIP file, and activate the plugin.
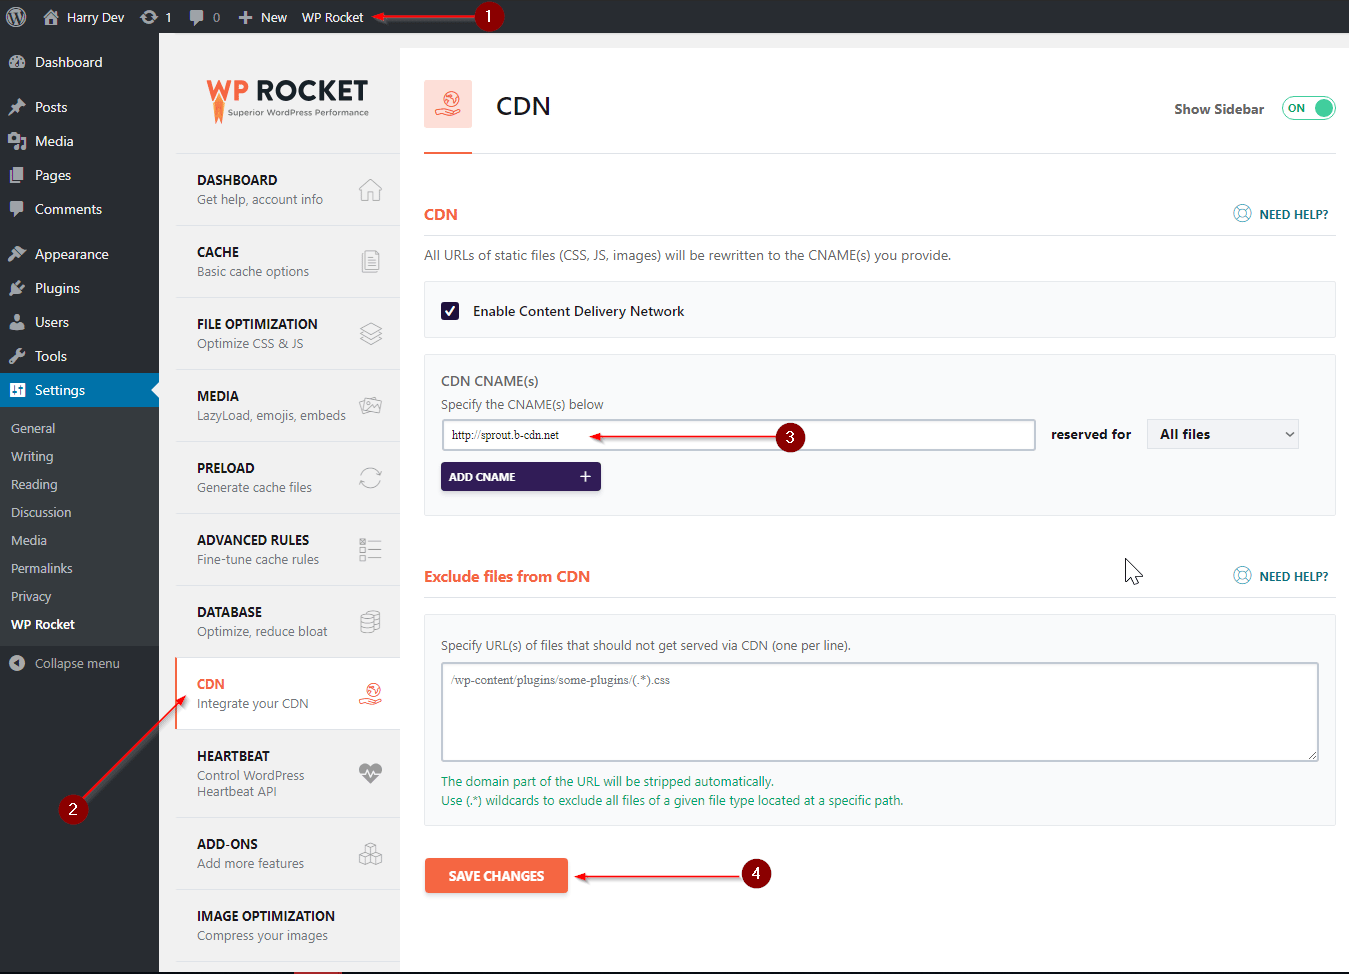
Click the **WP Rocket** option in your WordPress admin bar, then go to **CDN Settings**. Enter the full hostname of your Pull Zone (including `https://`) and save your changes.
 Open your site in an Incognito/Private Browsing window. In the browser's Developer Tools, open the **Sources** panel. You should see static assets being served from your CDN hostname.
WP Rocket forces a no-cache instruction (`max-age=0`) on HTML files to ensure
those pages are treated as dynamic. HTML pages will not be cached on the CDN
unless you configure this explicitly via WP Rocket settings or an Edge Rule on
your bunny.net Pull Zone.
Open your site in an Incognito/Private Browsing window. In the browser's Developer Tools, open the **Sources** panel. You should see static assets being served from your CDN hostname.
WP Rocket forces a no-cache instruction (`max-age=0`) on HTML files to ensure
those pages are treated as dynamic. HTML pages will not be cached on the CDN
unless you configure this explicitly via WP Rocket settings or an Edge Rule on
your bunny.net Pull Zone.