> ## Documentation Index
> Fetch the complete documentation index at: https://bunnynet-cb9733c2-support-migration.mintlify.site/llms.txt
> Use this file to discover all available pages before exploring further.
# SSL for Custom Domains
> Enable free Let's Encrypt SSL or upload your own certificate for custom hostnames.
Bunny provides free auto-renewing SSL certificates via Let's Encrypt, or you can upload your own certificate from a commercial provider.
## Prerequisites
Your custom domain must point to Bunny using a CNAME record before SSL validation can succeed. See [Custom Hostname](/cdn/custom-hostname) for setup instructions.
On Cloudflare, disable the proxy option (orange cloud icon). Proxying hides
DNS resolution and prevents SSL validation from working.
## Free Let's Encrypt certificate
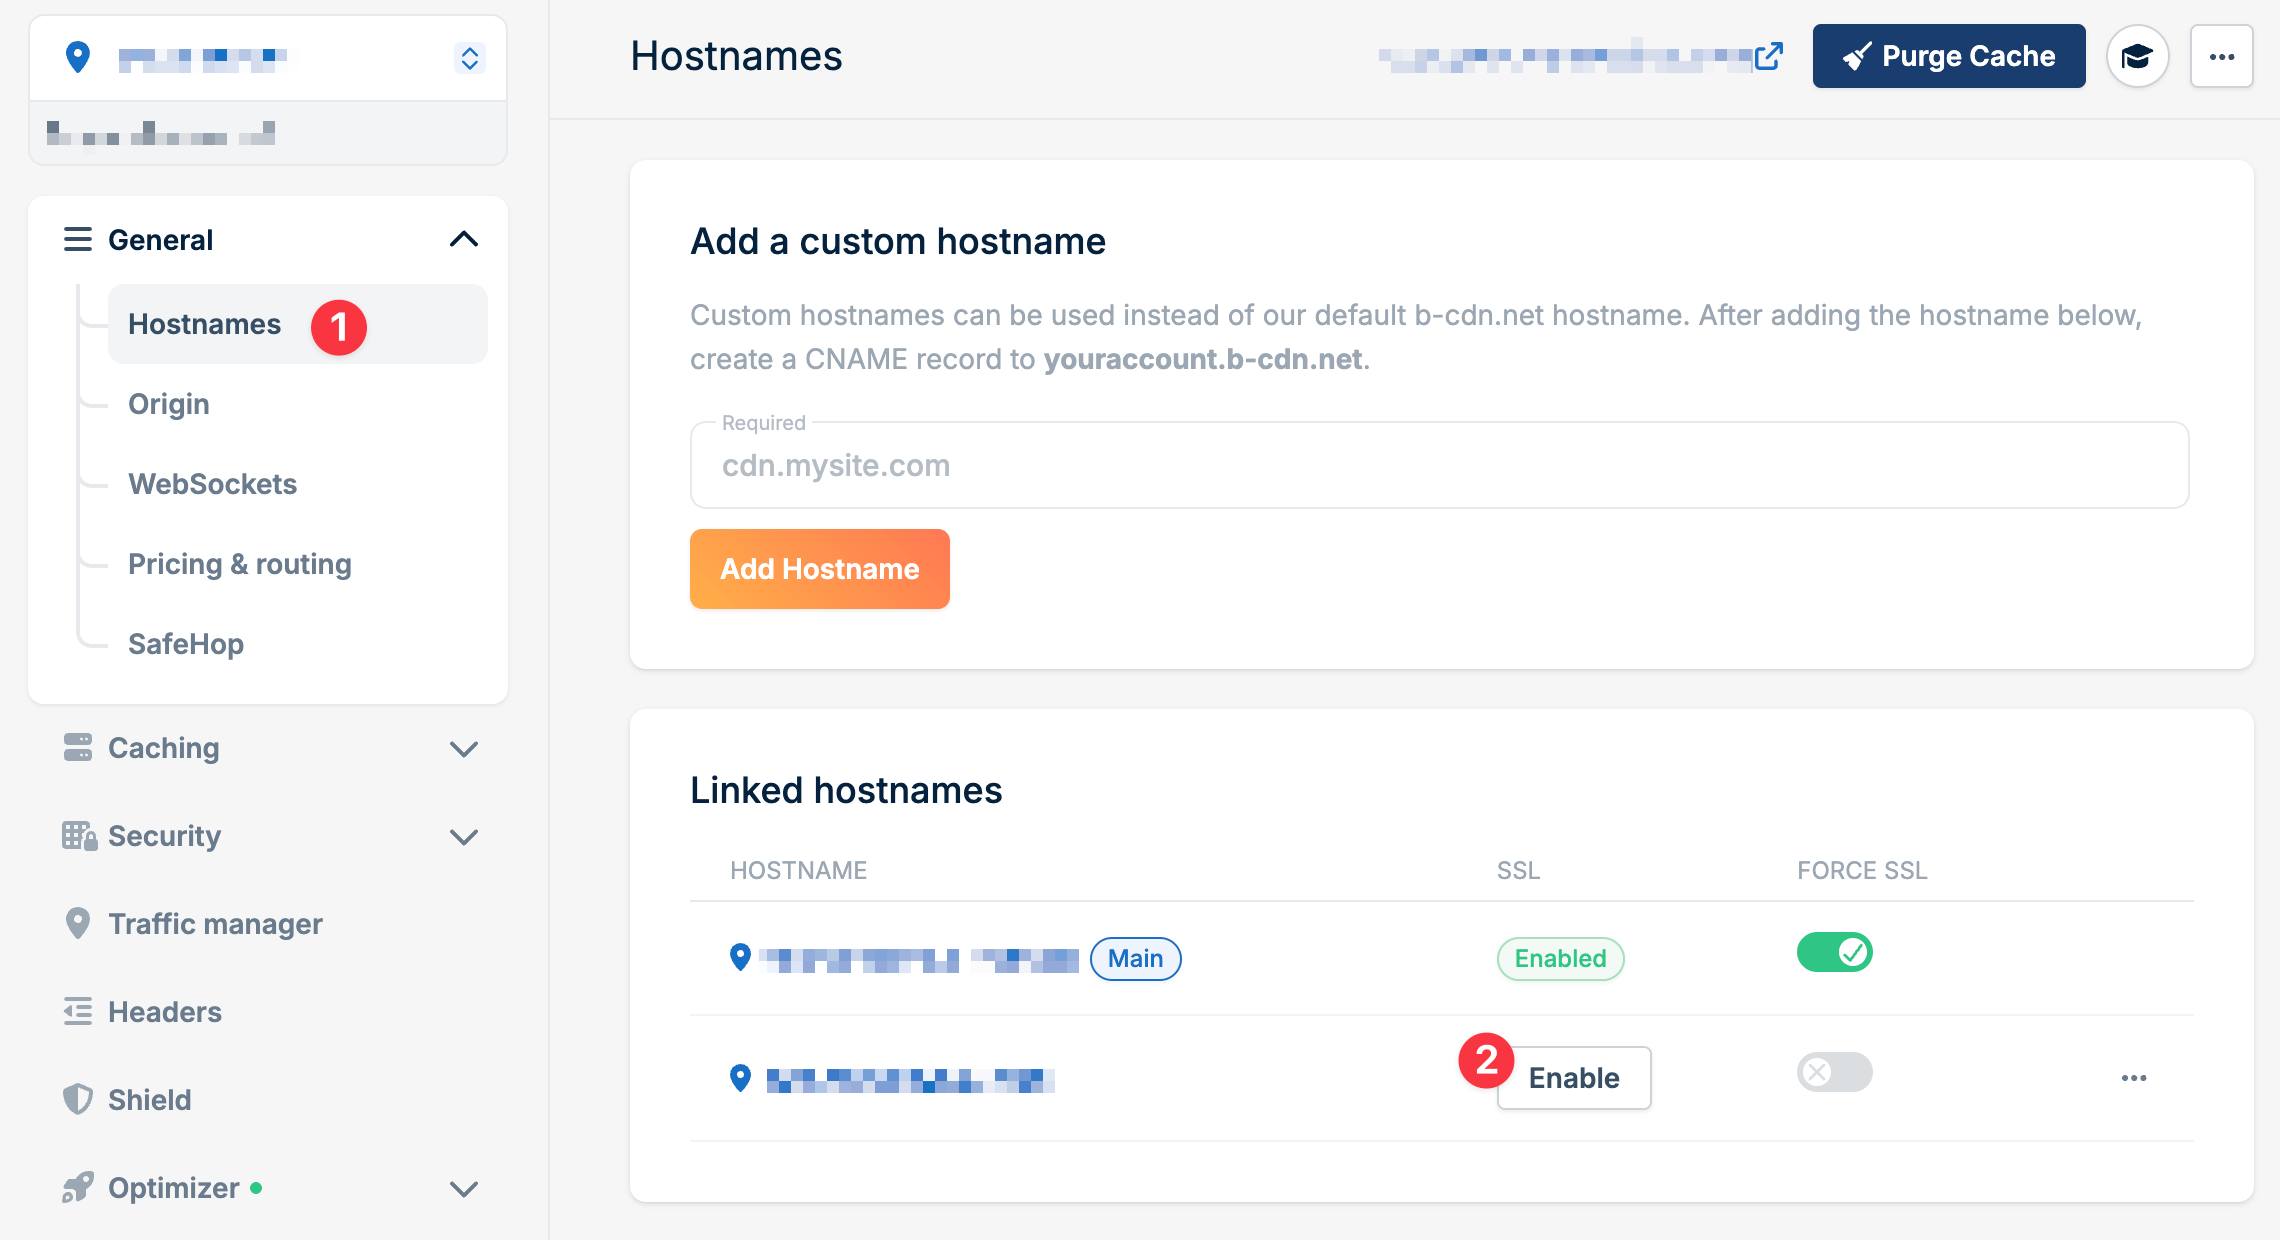
Open your Pull Zone in the [dashboard](https://dash.bunny.net), navigate to **General** > **Hostnames**, and add your custom hostname if you haven't already.
Find your hostname in the **Linked Hostnames** section and click **Enable**.
 Choose **Add Free Let's Encrypt Certificate** and click **Continue**.
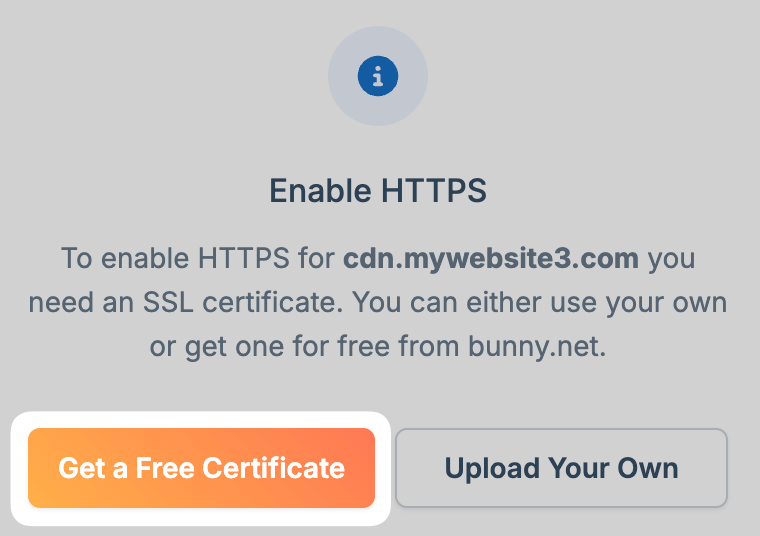 Bunny issues and installs the certificate automatically. Renewal is handled for you.
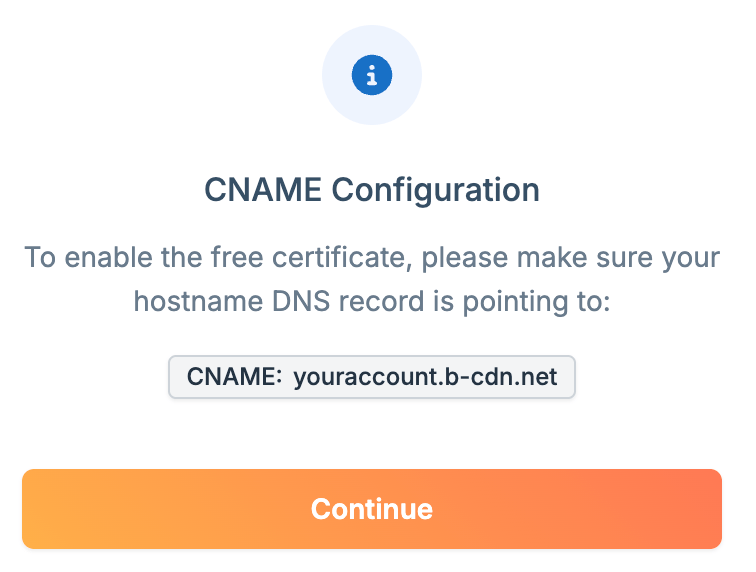
Verify your CNAME record is correctly configured and click **Continue** to complete validation.
Bunny issues and installs the certificate automatically. Renewal is handled for you.
Verify your CNAME record is correctly configured and click **Continue** to complete validation.
 Visit your domain using `https://` and confirm the certificate is valid. You can also use [SSL Labs](https://www.ssllabs.com/ssltest/) to test.
## Custom certificate
Use this option for wildcard domains (`*.yourdomain.com`) or certificates from commercial providers.
Bunny requires Nginx-compatible format. Combine your certificate chain into a single file by placing your domain certificate at the top, followed by intermediate certificates in order. Save as a single `.pem` file (e.g., `fullchain.pem`). You'll also need your private key file.
Open your Pull Zone, go to **Hostnames**, find your hostname, and click **Enable**.
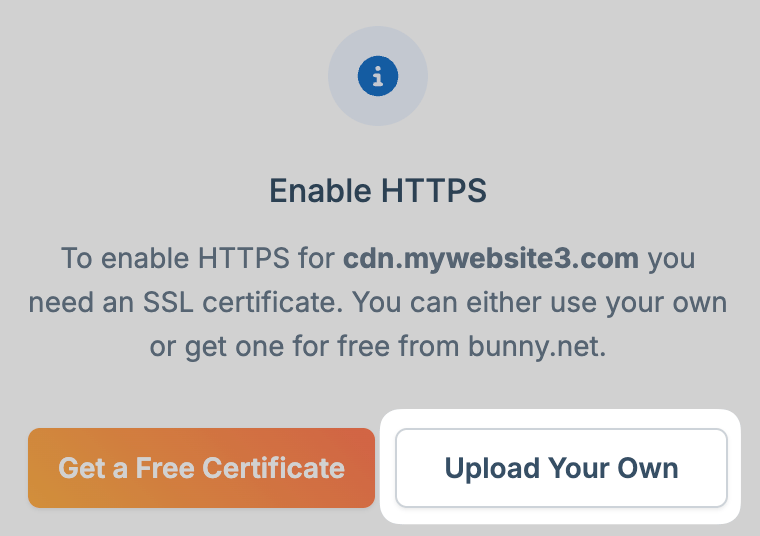
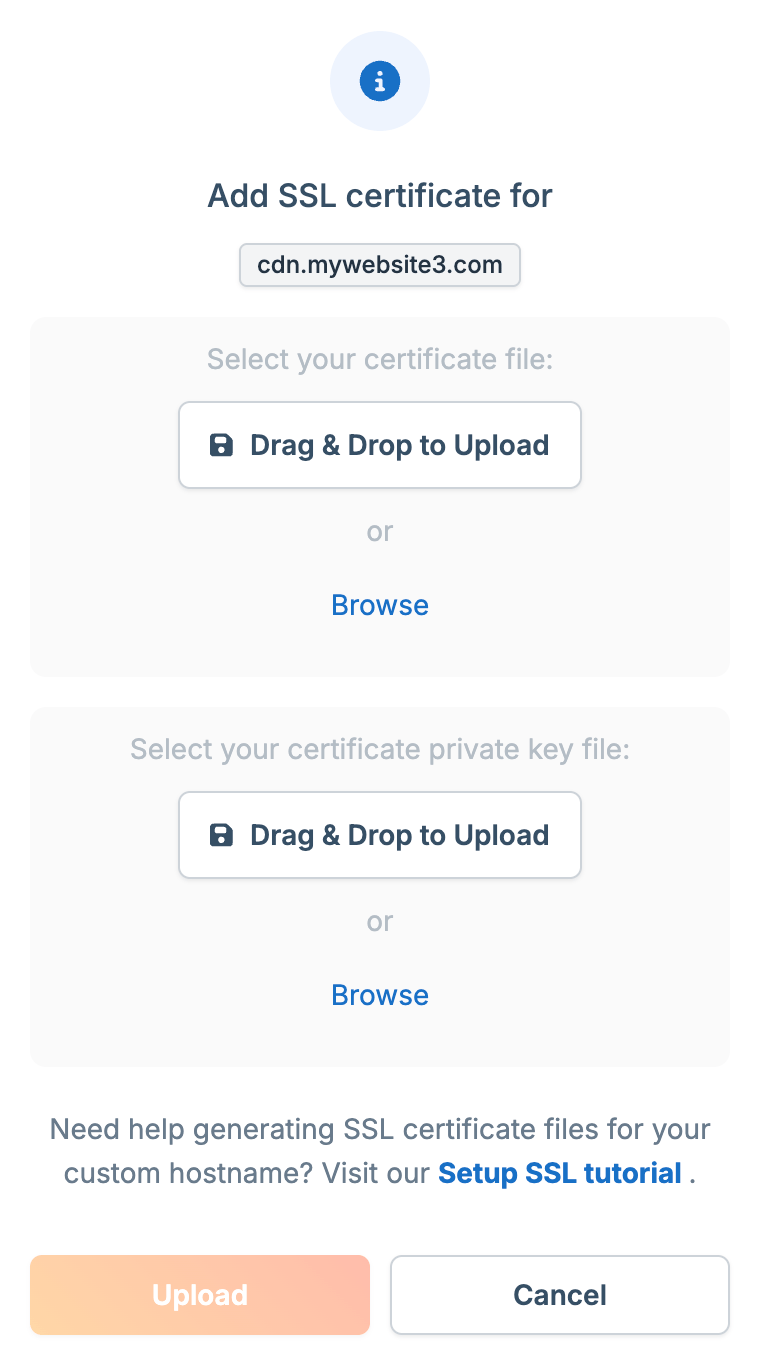
Choose **Upload your own certificate** and click **Continue**.
Visit your domain using `https://` and confirm the certificate is valid. You can also use [SSL Labs](https://www.ssllabs.com/ssltest/) to test.
## Custom certificate
Use this option for wildcard domains (`*.yourdomain.com`) or certificates from commercial providers.
Bunny requires Nginx-compatible format. Combine your certificate chain into a single file by placing your domain certificate at the top, followed by intermediate certificates in order. Save as a single `.pem` file (e.g., `fullchain.pem`). You'll also need your private key file.
Open your Pull Zone, go to **Hostnames**, find your hostname, and click **Enable**.
Choose **Upload your own certificate** and click **Continue**.
 Paste your certificate chain and private key into the respective fields, then click **Upload**.
 Wait for the certificate to propagate across the network.
Let's Encrypt wildcard certificates are not supported through Bunny's
automatic issuance. For wildcards, generate the certificate yourself (e.g.,
using certbot with DNS validation) and upload it manually.
## Troubleshooting
### SSL validation fails
Common causes:
* **DNS not propagated**: Use [dnschecker.org](https://dnschecker.org) to confirm your CNAME is resolving globally. After updating a DNS record, wait a few minutes before requesting the certificate so the change can propagate, otherwise our servers may read a stale cached record
* **Incorrect CNAME record**: Verify with a [DNS lookup tool](https://toolbox.googleapps.com/apps/dig/) that your hostname returns a CNAME pointing to the exact hostname of your Pull Zone. If you use [Bunny DNS](/dns), point your custom domain's CNAME to your `b-cdn.net` Pull Zone hostname
* **Cloudflare proxy enabled**: Disable the orange cloud icon on your CNAME record
* **Geolocation blocks**: Let's Encrypt validates from multiple regions (including USA and Europe). If you've blocked these regions via Traffic Manager or Edge Rules, validation will fail
* **CAA records**: If your domain has CAA DNS records, add `letsencrypt.org` to the allowed issuers, or remove the CAA records to allow any issuer
### Rate limiting
Requesting certificates too many times in a short period can trigger Let's Encrypt rate limits (up to one week). Be patient when troubleshooting DNS issues before retrying. If you need SSL immediately while rate-limited, upload a [custom certificate](#custom-certificate) from another CA.
### Debugging a failed request
When a certificate request fails via the dashboard or API, the returned error includes an ACME challenge URL (like `https://acme-v02.api.letsencrypt.org/acme/chall/...`). Open it to see the exact reason the issuance failed. If you're still stuck, contact [support@bunny.net](mailto:support@bunny.net).
## Root domains
CNAME records aren't allowed at the apex level (`yourdomain.com`) by most DNS providers. You have two options:
1. Use a subdomain like `www.yourdomain.com` with a CNAME, then redirect the apex to it
2. Use [Bunny DNS](/dns) with [CDN Acceleration](/cdn/cdn-acceleration), which handles this automatically
Wait for the certificate to propagate across the network.
Let's Encrypt wildcard certificates are not supported through Bunny's
automatic issuance. For wildcards, generate the certificate yourself (e.g.,
using certbot with DNS validation) and upload it manually.
## Troubleshooting
### SSL validation fails
Common causes:
* **DNS not propagated**: Use [dnschecker.org](https://dnschecker.org) to confirm your CNAME is resolving globally. After updating a DNS record, wait a few minutes before requesting the certificate so the change can propagate, otherwise our servers may read a stale cached record
* **Incorrect CNAME record**: Verify with a [DNS lookup tool](https://toolbox.googleapps.com/apps/dig/) that your hostname returns a CNAME pointing to the exact hostname of your Pull Zone. If you use [Bunny DNS](/dns), point your custom domain's CNAME to your `b-cdn.net` Pull Zone hostname
* **Cloudflare proxy enabled**: Disable the orange cloud icon on your CNAME record
* **Geolocation blocks**: Let's Encrypt validates from multiple regions (including USA and Europe). If you've blocked these regions via Traffic Manager or Edge Rules, validation will fail
* **CAA records**: If your domain has CAA DNS records, add `letsencrypt.org` to the allowed issuers, or remove the CAA records to allow any issuer
### Rate limiting
Requesting certificates too many times in a short period can trigger Let's Encrypt rate limits (up to one week). Be patient when troubleshooting DNS issues before retrying. If you need SSL immediately while rate-limited, upload a [custom certificate](#custom-certificate) from another CA.
### Debugging a failed request
When a certificate request fails via the dashboard or API, the returned error includes an ACME challenge URL (like `https://acme-v02.api.letsencrypt.org/acme/chall/...`). Open it to see the exact reason the issuance failed. If you're still stuck, contact [support@bunny.net](mailto:support@bunny.net).
## Root domains
CNAME records aren't allowed at the apex level (`yourdomain.com`) by most DNS providers. You have two options:
1. Use a subdomain like `www.yourdomain.com` with a CNAME, then redirect the apex to it
2. Use [Bunny DNS](/dns) with [CDN Acceleration](/cdn/cdn-acceleration), which handles this automatically